Elevate Your Homemade Pizza Beyond Takeout Quality
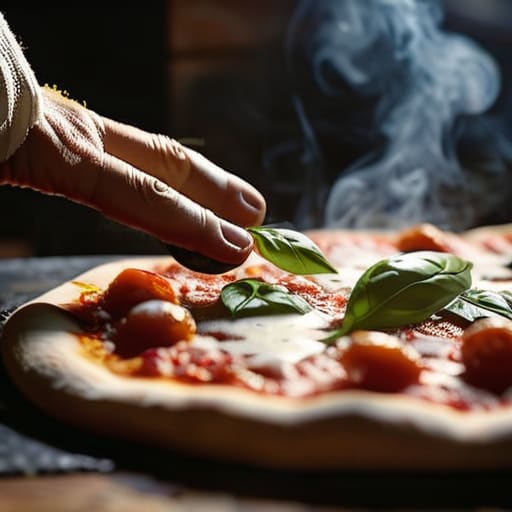
Stop scrolling through those aesthetic TikToks of people making artisanal sourdough crusts in wood-fired ovens and let’s get real for a second. You don’t need a $500 stone or a degree in fermentation to figure out how to make homemade pizza that actually tastes good. For the longest time, I thought I was failing because my kitchen didn’t look like a professional pizzeria and my dough wasn’t perfectly puffed. But honestly? Most of those “pro” recipes are just performative perfection designed to make you feel like you need more gear than you actually do.
I’m not here to sell you on expensive imported flour or fancy gadgets you’ll only use once. Instead, I want to show you how to build a killer pie using the basic staples sitting in your pantry right now. I’m going to walk you through a low-stress, budget-friendly method that focuses on flavor over flair. We’re talking about real, edible food that satisfies a craving without draining your bank account or leaving you with a mountain of dishes. Let’s just get cooking.
Recipe Details
Ingredients
- 250g Type 00 flour
- 150ml Warm water
- 7g Dried yeast
- 5g Sea salt
- 100ml San Marzano tomato sauce
- 150g Fresh mozzarella cheese
- 4-5 Fresh basil leaves
- 1 tbsp Extra virgin olive oil
Recipe Instructions
Step 1
First, let’s get the dough going. If you aren’t feeling up to making it from scratch with yeast and flour, honestly, just buy the pre-made dough from the grocery store. It saves time and isn’t “cheating”—it’s being smart. If you are making your own, mix your flour, water, salt, and yeast in a bowl until it’s a shaggy mess, then knead it on your counter for about ten minutes. It’s a great way to decompress after a long day, and you’ll feel way more accomplished when it’s done.
Step 2
Once your dough has had a chance to rise (or if you’re using the store-bought stuff), it’s time to prep your workspace. I usually clear off a small section of my kitchen counter and sprinkle it with a bit of flour so nothing sticks. Don’t worry about having a fancy pizza stone; a standard baking sheet works perfectly fine. Just make sure it’s clean and ready to go.
Step 3
Now, let’s talk toppings, and please, don’t feel pressured to go out and buy expensive buffalo mozzarella or organic basil if it’s not in your budget. I love using whatever is left in my fridge—half a jar of marinara, some leftover cooked chicken, or even just a handful of those random veggies from the community garden. The goal is to use what you have so you aren’t wasting money on ingredients that just sit in the crisper drawer.
Step 4
Spread your sauce thin—if you go too heavy, you’ll end up with a soggy center, and nobody wants that. Layer your cheese and toppings on top, but keep it relatively simple. If you pile it too high, the dough won’t cook through properly. I like to leave a little bit of room around the edges so the crust can get that nice, golden-brown crunch we’re all after.
Step 5
Crank your oven as high as it will go—usually around 475°F or 500°F—and slide your pizza in. Since every oven is a little different, start checking it after about 10 or 12 minutes. You’re looking for bubbling cheese and a crust that looks toasted. Once it’s done, let it sit for a minute before slicing so the toppings don’t slide right off. Grab a plate, find a spot to sit, and actually enjoy it.
Mastering Yeast Dough Fermentation Without the Fancy Equipment
Look, I know the internet loves to act like you need a temperature-controlled proofing box or some high-end Italian gadgetry to get a decent rise. Honestly? You don’t. The yeast dough fermentation process is mostly just about patience and giving those little microbes enough time to do their thing. If you’re living in a small apartment like I am, you don’t need a dedicated space; just tuck your bowl in a draft-free corner or even inside a turned-off oven with the light on. It’s not about being perfect; it’s just about letting the dough develop flavor at its own pace.
If you’re craving that authentic Neapolitan style pizza vibe but don’t want to drop a paycheck on a professional oven, don’t sweat it. You don’t need the “best pizza stone for home ovens” to get results. I usually just flip a heavy baking sheet upside down and let it preheat for a while. It’s a total budget hack that still gives you those crispy crust tips we’re all chasing. Just focus on the basics and trust the process.
Real Crispy Crust Tips Using Your Existing Kitchen Tools
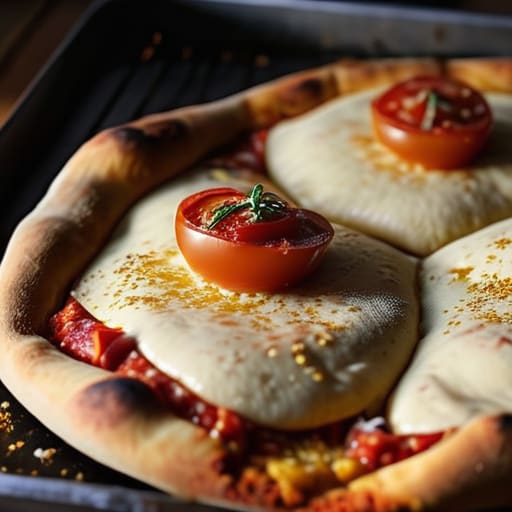
Look, I know the internet wants you to believe you need a $200 specialized oven or a professional-grade stone to get a decent crunch, but we aren’t doing that here. If you don’t own the best pizza stone for home ovens, don’t sweat it. I actually swear by a heavy baking sheet turned upside down. It creates a flat, stable surface that helps distribute heat more evenly than a flimsy tray. For an extra boost, preheat that sheet in your oven for at least thirty minutes before the dough even touches it. That intense initial heat is the secret to those essential crispy crust tips that keep your slice from turning into a soggy mess.
If you’re craving something closer to an authentic Neapolitan style pizza, try sliding your dough onto a piece of parchment paper first, then sliding the paper and dough directly onto your hot baking sheet. It makes transferring the raw dough way less stressful. Also, don’t overdo the toppings; if you pile on too much moisture, no amount of heat will save your crust. Keep it simple, keep it hot, and let your basic kitchen gear do the heavy lifting.
Five Ways to Level Up Without Breaking the Bank
- Stop overcomplicating the sauce. You don’t need a simmered, slow-cooked masterpiece; just crush a can of decent tomatoes, add a pinch of salt, some dried oregano, and a splash of olive oil. The heat from the oven does the heavy lifting for you.
- Watch your toppings like a hawk. It’s tempting to pile on everything in the fridge, but a heavy pizza becomes a soggy, sad mess. Stick to a light hand—less is actually more when you want that crust to stay structural.
- Use what you have for cheese. If you can’t afford a block of fresh buffalo mozzarella, don’t sweat it. A decent low-moisture shredded mozzarella works perfectly fine, and honestly, a little bit of salty parmesan can make even the budget stuff taste expensive.
- Prep your dough ahead of time if you can. I know, life is chaotic, but letting your dough sit in the fridge overnight (cold fermentation) is the ultimate “lazy girl” hack for better flavor. It’s basically free flavor that requires zero extra effort.
- Don’t fear the “ugly” pizza. If your crust isn’t a perfect, golden-brown circle like a Pinterest photo, who cares? If it tastes good and you didn’t spend $30 on delivery, you’ve already won. Embrace the char and the weird shapes.
The Low-Stress Pizza Cheat Sheet
Forget the expensive pizza stones; a preheated baking sheet or even a cast-iron skillet you already own will do the job perfectly fine.
Don’t stress over “perfect” dough—it’s meant to be rustic, so if it looks a little wonky, just call it artisanal and move on.
Keep your toppings simple to avoid a soggy crust; less is always more when you’re working with a homemade base.
The Real Secret to Pizza Night
At the end of the day, making pizza at home isn’t about having a stone-fired oven or a stash of expensive, artisanal flour tucked away in your pantry. It’s really just about understanding how to work with what you’ve got—whether that’s letting your dough ferment slowly on the counter or figuring out how to get that perfectly crispy crust using a standard baking sheet. You don’t need a culinary degree or a massive grocery budget to master the basics; you just need a little bit of patience and the willingness to get your hands a little floury. Once you stop worrying about making it look like a professional photoshoot and start focusing on the functional basics, the process actually becomes fun instead of stressful.
My biggest piece of advice? Don’t be afraid to mess up a batch. I’ve definitely had pizzas come out looking more like flatbreads or tasting a little too yeasty, and honestly, they were still delicious. This is your kitchen, not a high-stakes cooking competition. Use the tools you already own, stretch your budget by skipping the delivery fees, and just make it your own. Life is way too short to stress over a slightly uneven crust when you could be sitting down with a warm slice and a moment of actual peace. Grab a knife, slice it up, and enjoy the win.
Frequently Asked Questions
My dough isn't rising at all—did I accidentally kill the yeast or is my kitchen just too cold?
Honestly, it’s probably one of two things. First, check your water temperature—if it was too hot, you definitely killed the yeast. If it felt lukewarm, you’re likely fine. Second, my apartment gets freezing in the winter, and cold dough is a total momentum killer. Try moving your bowl to a slightly warmer spot, like inside a turned-off oven with the light on. Give it more time; patience is free, unlike a new bag of yeast.
Can I actually use a regular baking sheet instead of a pizza stone, or is that going to result in a soggy mess?
Honestly, please don’t stress about the stone. I used to think I needed one, but a regular baking sheet works just fine if you know the trick. To avoid that soggy middle, preheat your sheet in the oven while it’s heating up. Sliding your dough onto a hot pan gives you that immediate sear you’re looking for. It’s not “perfect,” but it’s functional, it’s cheap, and it actually tastes great.
I'm trying to save money; can I swap out the expensive mozzarella for something else without ruining the vibe?
Look, I get it. High-quality fresh mozzarella is a total vibe, but it’s also a total budget killer. You don’t need it. Honestly, just grab a block of mild provolone or even a decent sharp cheddar and shred it yourself. Avoid that pre-shredded stuff in the bags—it’s coated in potato starch to keep it from clumping, which ruins the melt. Shredding your own is cheaper and actually gives you that gooey, satisfying stretch.