Getting Started With Resin: an Easy Beginner’s Manual
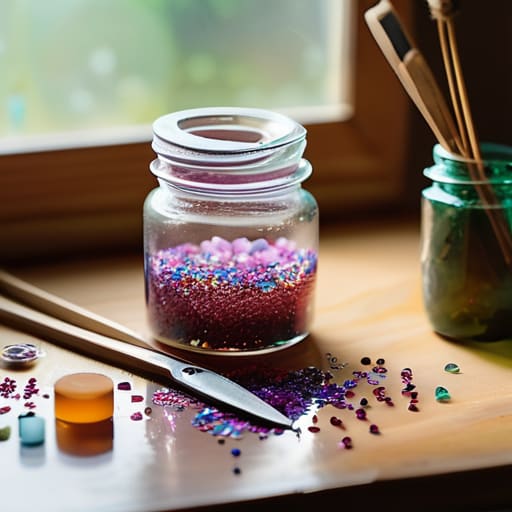
I was staring at a $60 “all-in-one” starter kit on my screen, wondering if I actually needed a professional-grade UV lamp and a dozen specialized pigments just to make a simple coaster. Honestly, it felt like a total scam. Every time I searched for resin crafts for beginners, I was met with these hyper-curated, aesthetic setups that looked more like a science lab than a fun weekend project. But here’s the truth: you don’t need a massive investment or a studio apartment to get started. I learned the hard way that most of those fancy additives are just expensive fluff that you can easily bypass with stuff you probably already have in your junk drawer.
In this guide, I’m stripping away the performative perfection and giving you the real, unpolished version of how to actually succeed. I’ll show you how to pick supplies that won’t wreck your bank account and how to avoid the common, sticky disasters that usually drive people to quit. We’re focusing on functional, low-cost methods that actually work, so you can start creating something beautiful without the unnecessary stress or the influencer-sized price tag. Let’s just get messy and make something cool.
Guide Overview
Tools & Supplies
- Silicone molds for shaping the resin
- Mixing cups for combining components
- Stirring sticks for blending
- Heat gun or torch to remove bubbles
- Protective gloves to prevent skin contact
- Epoxy resin kit (2-part resin and hardener)
- Liquid pigments or mica powder for color
- Measuring scale or graduated cups for accuracy
- Sandpaper for smoothing edges
Step-by-Step Instructions
- 1. First things first: set up your workspace. I cannot stress this enough—resin is incredibly messy and it doesn’t play well with others. Find a flat surface that you don’t particularly care about, like an old wooden table or a piece of cardboard, and cover it with a silicone mat or even just some cheap plastic sheeting from the dollar store. You want a space where you can wipe up spills easily without having a total meltdown when a drop escapes your mold.
- 2. Grab your gear, but keep it simple. You don’t need a professional studio setup; you just need a basic epoxy resin kit, some silicone molds, mixing cups, and wooden stir sticks. If you’re trying to be extra thrifty, you can often find silicone molds at thrift stores or even use old plastic containers—just make sure they’re clean. Most importantly, please don’t skip the safety gear. A pair of gloves and a mask aren’t optional if you want to avoid breathing in fumes all afternoon.
- 3. Now, let’s talk measurement. This is where most people mess up and end up with a sticky, half-cured disaster. Read your specific resin instructions very carefully because some are 1:1 ratios and others are more complex. Use a small scale if you have one, but if you’re sticking to volume, use your measuring cups precisely. If you eyeball it, you’re basically just gambling with your supplies, and we both know that’s a waste of money.
- 4. Time to mix. Pour your resin and hardener into a cup and start stirring slowly. You want to make sure you’re scraping the sides and the bottom of the cup constantly. If you stir too fast, you’ll create a bunch of tiny bubbles that look like annoying little craters in your finished piece. I usually stir for at least three full minutes until the liquid looks completely clear and uniform.
- 5. Add your personality. This is the fun part where you decide if you want to go full maximalist with glitter or keep it chill with some dried flowers from your garden. If you’re using pigments or dyes, add them a tiny bit at a time. It’s much easier to add more color than it is to fix a piece that ended up looking like a neon nightmare.
- 6. Pour and wait. Slowly pour your mixture into your molds. If you see bubbles rising to the surface, you can lightly pass a lighter or a heat gun over them to pop them, but don’t overdo it. Once it’s in, leave it alone. This is the hardest part for me, but you have to resist the urge to keep poking it. Cover it with a box so no stray dust or pet hair lands in your perfect little creation while it cures.
- 7. De-molding and finishing. Once the resin is hard (usually 24 hours, but check your kit), gently peel the mold away. If the edges feel a little sharp or uneven, don’t panic. You can use a piece of fine-grit sandpaper to smooth them out. It’s not about making it look like a factory-made masterpiece; it’s about making something functional and pretty that you actually made with your own two hands.
Essential Resin Art Supplies That Actually Work
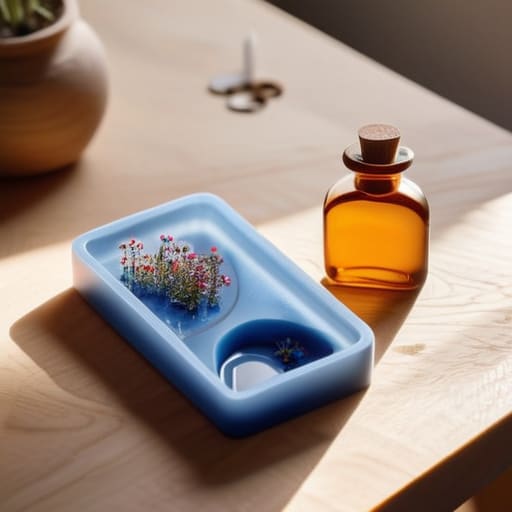
Look, you don’t need a studio full of professional-grade equipment to get started, but you do need to be smart about what you buy. When you’re hunting for essential resin art supplies, resist the urge to buy those massive, expensive all-in-one kits you see on social media. Most of that is just filler. Instead, focus your budget on a decent quality epoxy and a set of silicone molds. Speaking of molds, pay attention to different resin mold types and uses; if you want to make jewelry, go for small, intricate shapes, but if you’re trying to upcycle a thrifted tray, you’ll need something sturdier and larger.
One thing I learned the hard way? Don’t skimp on your workspace setup. Since we’re keeping this budget-friendly, you don’t need a fancy ventilation system, but you must prioritize safety precautions for working with epoxy, like wearing gloves and working in a room with an open window. It’s not glamorous, but breathing in those fumes is definitely not worth the “aesthetic” of a messy desk. Just keep it simple, keep it safe, and use what you’ve got.
Safety Precautions for Working With Epoxy Without Overcomplicating It
Look, I’m all for being resourceful, but we need to have a real talk about the chemistry side of this hobby. Epoxy isn’t just some fancy glue; it’s a chemical reaction, and you don’t want to mess with your lungs or skin just for the sake of a cute coaster. My biggest piece of advice? Work in a space with actual airflow. If you’re tucked away in a tiny, unventilated corner of your apartment, please crack a window or set up a small fan. I used to think I could get away with working in my bedroom, but the smell is no joke and it definitely messes with my focus.
Beyond the air quality, please don’t skip the gloves. I know, it feels a bit extra when you’re just trying to mix a small batch, but getting resin on your skin is sticky, annoying, and not great for you. Also, if you’re still figuring out your resin mixing ratios for beginners, be precise. If you don’t get the math right, you won’t just end up with a mess; you’ll end up with a tacky, half-cured disaster that never dries. It’s better to spend an extra two minutes being careful than to waste your supplies on a failed project.
5 Real-World Truths About Resin (That Your Pinterest Board Won't Tell You)
- Stop obsessing over “perfect” molds. If you’re just starting, don’t go out and buy a $40 silicone set of intricate crystals. Grab some cheap, basic geometric shapes or even old ice cube trays (if you don’t mind them being permanently dedicated to art). It’s much easier to learn how the liquid behaves when you aren’t stressed about wasting expensive gear.
- Temperature is your invisible enemy. I’ve learned the hard way that if your workspace is too cold, your resin will stay cloudy or never fully cure, no matter how long you wait. If your apartment feels chilly, try warming up your resin bottles in a warm water bath before mixing. It makes a massive difference in how smoothly everything flows.
- Bubbles happen, but don’t panic. You don’t need a professional-grade heat gun to get rid of them; sometimes a simple lighter or even just letting the piece sit for a few minutes before pouring can do the trick. If you see a few tiny bubbles in your finished piece, just call it “character” and move on. We’re making art, not lab samples.
- The “stirring” trap is real. This is where most beginners mess up. You might think you’re being thorough, but if you stir too fast or too long, you’re basically just whisking air into the mix. Stir slowly, steadily, and scrape the sides of the cup like your life depends on it. It’s tedious, I know, but it saves you from a sticky, half-cured disaster.
- Embrace the mess (but protect your surfaces). Resin is incredibly forgiving until it hits your favorite wooden coffee table—then it’s a nightmare. Don’t just use a piece of newspaper; get a cheap silicone mat or even some old plastic placemats you found at a thrift store. It makes the cleanup ten times faster and saves you from a massive headache later.
The TL;DR Version
Don’t let the “aesthetic” Pinterest setups intimidate you; you don’t need a studio or a mountain of expensive molds to make something cool.
Prioritize your safety over everything else—a good mask and a ventilated space are non-negotiable, even if you’re just doing a small project.
Embrace the mess and the mistakes, because most of the learning happens when your first pour looks a little wonky.
Don't Sweat the Imperfections
At the end of the day, resin art isn’t about creating a museum-quality masterpiece on your very first try. We’ve covered the basics: grab some decent supplies without overspending, keep your workspace ventilated so you aren’t breathing in fumes, and just follow the mixing ratios like your life depends on it. It’s totally normal if your first few coasters have a tiny bubble or two, or if the color isn’t exactly what you saw on a curated Pinterest board. The goal here was to get you started with the tools you actually have, not to turn your living room into a professional studio overnight.
Just remember that the whole point of doing this is to actually enjoy your time, not to add another source of stress to your to-do list. If a project turns out a little wonky, call it “organic” and move on. Real creativity is messy, a little bit unpredictable, and honestly, a lot more fun than trying to achieve that sterile, influencer-perfect look. So, grab your mixing sticks, clear off a corner of your table, and just start making things. You don’t need a perfect setup to build something that actually feels meaningful to you.
Frequently Asked Questions
How do I stop those annoying tiny bubbles from ruining my piece without buying an expensive heat gun?
Look, I get it. You’re staring at your piece and it looks like it’s filled with tiny, annoying bubbles, and the last thing you want to do is drop $50 on a professional heat gun. Honestly? Save your money. You can usually fix this with a simple lighter or even a toothpick. Just carefully pass a flame near the surface to pop them, or gently stir the resin to release the air. It’s not perfect, but it works.
Can I actually use old trinkets or dried flowers from my garden, or will they just turn brown and gross inside the resin?
You absolutely can, but don’t just toss them in and hope for the best. If you drop fresh flowers straight into resin, they’ll turn brown and look like something from a horror movie. You have to dry them first—silica gel is your best friend here. As for old trinkets, just give them a good scrub. If they’re metal, make sure they aren’t corroding, or the resin might react. Keep it simple, but prep is key.
What's the best way to clean up a sticky mess if I accidentally spill some before it sets?
Ugh, the literal worst. If it’s still tacky, don’t panic and definitely don’t just wipe it with a dry paper towel—you’ll just smear it everywhere. Grab some isopropyl alcohol (the higher the percentage, the better) and a lint-free cloth. Blot the mess instead of rubbing. If it’s on a surface you care about, test a tiny spot first. If it’s already turning into a gummy nightmare, sometimes it’s easier to just let it harden completely and scrape it off later.







