Constructing a Sturdy Trellis for Your Climbing Plants
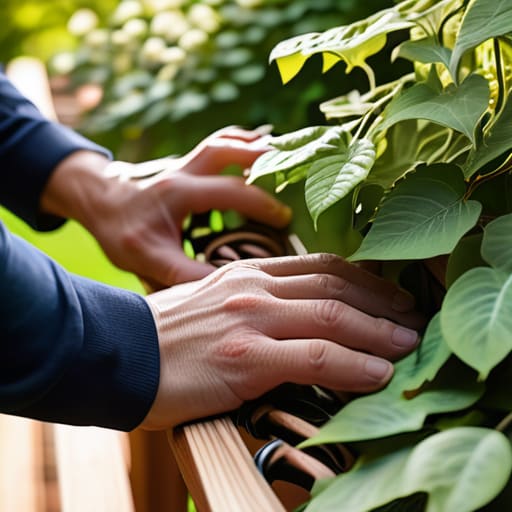
I was standing in the middle of my tiny community garden plot last Saturday, staring at a $45 plastic trellis from the big-box store and feeling genuinely annoyed. It looked flimsy, it was made of cheap, non-recyclable junk, and honestly, it would probably snap the second my heavy heirloom tomatoes started to climb. We’ve been sold this idea that if we want a beautiful garden, we have to go out and buy these perfectly aesthetic kits that cost a fortune, but that’s just not true. If you’re looking for how to build a garden trellis that actually lasts, you don’t need a massive budget or a degree in carpentry; you just need to look at what you already have in your shed or even in your recycling bin.
In this guide, I’m skipping the fancy, overpriced hardware and showing you how to build something sturdy using scrap wood, old twine, or even those leftover bamboo stakes from your last takeout order. I’ll walk you through a few different methods that are actually functional and won’t break the bank. We’re focusing on DIY solutions that look lived-in and intentional, rather than manufactured and fake. Let’s get growing.
Guide Overview
Tools & Supplies
- Measuring tape for accurate cuts
- Hand saw or miter saw for timber
- Drill with bits for pilot holes
- Screwdriver or drill driver for assembly
- Wooden stakes or 2×2 lumber (4 pieces)
- Thin wooden dowels or wire (10-15 pieces)
- Exterior grade wood screws (1 small box)
- Wood glue (1 small bottle)
Step-by-Step Instructions
- 1. First, take a look around your garage, the shed, or even that pile of “stuff” in the corner of your balcony. You don’t need a trip to the big-box hardware store to find specialized garden kits. I usually just look for scrap wood, old bamboo poles, or even some sturdy twine that’s just sitting around. The goal is to find something that can withstand a bit of rain without costing you a fortune.
- 2. Once you’ve gathered your materials, you need to decide on your structure. If you’re working with a small space or a container garden, a simple A-frame works wonders. If you have a bit more room, you might want to go for a vertical ladder style. Just make sure whatever you choose is actually stable enough to hold the weight of your plants once they start getting heavy with leaves and fruit.
- 3. Now, let’s talk about the “skeleton” of your trellis. If you’re using wood, you’ll want to secure your main vertical supports into the ground (or a heavy pot) first. If you’re using something lighter like twine or thin wire, you can wrap it around two upright stakes. I’m a huge fan of the criss-cross pattern because it gives the climbing vines plenty of little “handholds” to grab onto as they grow.
- 4. If you’re using twine or wire, don’t just tie it haphazardly. You want to create a consistent grid. I usually use a few old nails or even some repurposed screw hooks to keep the lines from sagging over time. A sagging trellis is a recipe for a tangled, messy disaster that’s a nightmare to prune later.
- 5. If you’re working with wood and want something a bit more permanent, this is where you might need a drill or some basic nails. Secure your horizontal slats to your vertical posts, leaving about 4 to 6 inches of space between them. This gap is just right for most peas, beans, or even small cucumber varieties to weave their way through.
- 6. Before you let your plants take over, give the whole structure a quick “shake test.” It sounds silly, but you want to make sure it isn’t going to topple over the first time a heavy summer thunderstorm hits. If it feels wobbly, add a bit more support or tie the base to a nearby fence or a heavy planter to keep it grounded.
- 7. Finally, get your plants in the ground and give them a little nudge. When you first transplant your climbers, gently guide one or two of the tendrils toward your new trellis. It’s not about doing all the work for them, but giving them a clear direction so they don’t spend all their energy searching for something to climb.
Smart Garden Trellis Materials List Without the Price Tag
Look, before you head to the big-box hardware store and start loading a cart with expensive cedar planks, let’s take a breath. Most of those “all-in-one” kits are a total rip-off, and honestly, they usually look pretty flimsy once your vines actually start getting heavy. When I’m putting together my own garden trellis materials list, I’m not looking for perfection; I’m looking for stability. I usually scout around for scrap wood, old pallet slats, or even some sturdy leftover wire from a previous project. If you can find some untreated timber or even some thick twine, you’re already halfway there without spending a dime of your grocery budget.
The secret to successful vertical gardening solutions isn’t about how much you spend, but how well the structure holds up against the wind and the weight of your plants. If you’re working with heavier climbers like beans or even small squash, skip the thin bamboo sticks that snap the moment it rains. Instead, look for something with a bit of actual grit—think reclaimed lath or even old metal mesh you might find at a local scrap yard. It’s about being resourceful, not being fancy.
Easy Diy Garden Structures for Real Vertical Gardening Solutions
If you’re working with a tiny balcony or just a patch of dirt that feels too small for a massive vegetable patch, you have to think vertically. Honestly, some of the best vertical gardening solutions I’ve used didn’t come from a catalog; they came from looking at what was already in my recycling bin or tool shed. If you aren’t ready to commit to a heavy-duty wooden build, try leaning an old wooden ladder against a wall or even stringing some heavy-duty twine between two sturdy stakes. These kinds of low-effort, high-reward setups work perfectly for lighter climbers like peas or beans without requiring a weekend of intense construction.
When you’re browsing for easy diy garden structures, don’t get caught up in the “perfect” look. I’ve seen people spend fifty bucks on a pre-made metal grid that looks pretty for a week before it starts sagging under the weight of a heavy tomato plant. Instead, focus on stability. If you’re using scrap wood, make sure it’s anchored well so a sudden summer storm doesn’t turn your garden into a pile of debris. It’s all about function over fashion here.
5 Things I Wish I Knew Before My First Trellis Fail
- Don’t get too precious about straight lines. If you’re using scrap wood or old twine, it’s going to look a little wonky, and that’s fine. Plants don’t care about aesthetic perfection; they just want something solid to grab onto.
- Test your stability before you plant anything. There is nothing more heartbreaking than spending three weeks nurturing a heavy tomato plant only to have your entire trellis tip over in a light breeze because you didn’t anchor the base properly.
- Leave some wiggle room for growth. It’s tempting to build something small to save space, but remember that vines are ambitious. If your trellis is too short, your plants will just spill over the sides and turn into a messy, unmanageable heap on the ground.
- Think about your future self when choosing materials. If you use something that’s going to rot in six months, you’re just creating more work for yourself later. Even if you’re being budget-conscious, try to find something that can actually stand up to the rain and sun.
- Keep the height in mind for your harvest. If you’re growing something like cucumbers that you want to pick easily, don’t build a trellis that’s so tall you’ll need a ladder every single time you want a snack. Build for the way you actually move in your garden.
The Real Bottom Line
Stop overthinking the “perfect” setup; your plants don’t care if your trellis is a reclaimed pallet or a piece of scrap wood, as long as it holds them up.
Always look at what you already have in your garage or junk drawer first—saving ten bucks on a kit is way more satisfying than buying something you’ll just replace next season.
Build for your specific space and plants, not for an Instagram photo—functional and sturdy beats “aesthetic” every single time.
Final Thoughts Before You Get Your Hands Dirty
At the end of the day, building a trellis doesn’t require a trip to a high-end garden center or a massive credit card bill. Whether you decided to repurpose some old twine, scavenged some scrap wood from a curb alert, or built a sturdy structure from basic materials you already had in the garage, you’ve done the hard part. You’ve moved past the “planning” phase and actually created something functional for your space. Remember, the goal wasn’t to build a Pinterest-perfect masterpiece; it was to give your climbing plants a way to reach the sunlight without breaking your budget.
Don’t let the fear of a slightly crooked line or a mismatched piece of wood stop you from starting. Gardens are meant to be lived in, not just looked at, and they definitely aren’t supposed to be perfect. Your plants don’t care if your trellis looks “aesthetic”—they just care that they have something to hold onto as they grow. So, grab your tools, embrace the beautifully imperfect reality of DIY, and just get growing. You’ve got this, and honestly, your garden is going to look so much better for it.
Frequently Asked Questions
How do I stop my trellis from tipping over when the plants actually start getting heavy?
Ugh, the “leaning tower of tomato” phase. I’ve been there. When those plants actually start thriving, they get heavy fast and can easily topple your whole setup. Honestly? Don’t bother with those flimsy little plastic stakes. Just grab some scrap wood or even a few heavy bricks to anchor the base. If you’re using a wire trellis, drive a sturdy stake deep into the ground right at the corner. Stability over aesthetics, always.
Can I use this same setup for heavy climbers like squash, or is this only for lighter stuff like peas?
Honestly? Not for the heavy hitters. If you try to put a massive butternut squash on a flimsy twine setup, it’s going to collapse, and you’ll end up with a smashed mess on the ground. For peas or beans, what we talked about is perfect. But for squash or cucumbers, you need something beefier—think actual wooden stakes or a repurposed metal garden fence. Don’t risk your harvest on a structure that can’t handle the weight.
What’s the best way to attach the vines to the structure without accidentally killing them or using a bunch of expensive clips?
Honestly, please don’t go buying those plastic garden clips; they’re expensive and usually just end up snapping or cutting into the stems. I usually just grab some scrap twine or even old strips of cotton fabric from a t-shirt I was going to toss. Tie them in loose loops—think “gentle hug” rather than “tight chokehold.” It gives the vines room to thicken as they grow without any risk of strangling them.







