How to Install Heavy-duty Floating Shelves That Won’t Sag
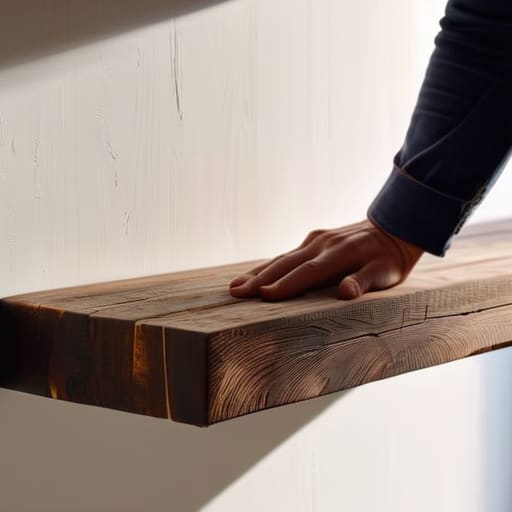
I was staring at my cramped apartment wall last Tuesday, surrounded by half-empty boxes and a pile of expensive, “aesthetic” home decor catalogs that felt more like a taunt than an inspiration. Every single one of them suggested these high-end, minimalist floating shelves that probably cost more than my monthly grocery budget. But here’s the truth: you don’t need a designer budget or a professional carpenter to get that clean, organized look. My journey into floating shelves diy didn’t start with a Pinterest-perfect workshop; it started with a piece of scrap wood I rescued from a curb alert and a very determined screwdriver.
I’m not here to sell you on some complicated, multi-step hack that requires a specialized power tool kit you’ll never use again. Instead, I’m going to show you how to tackle your own floating shelves diy project using functional, affordable methods that actually hold weight. We’re going to focus on the real stuff—how to find sturdy materials, how to avoid the dreaded “shelf sag,” and how to mount them without losing your mind (or a chunk of your drywall). Let’s stop overpaying for decor and just build something that works.
Guide Overview
Tools & Supplies
- Drill and drill bits for pilot holes and mounting
- Level to ensure shelves are straight
- Stud finder to locate wall supports
- Saw to cut wood to desired length
- Measuring tape for precision
- Wood planks (shelves) 1-2 pieces
- Floating shelf brackets or internal rods 1 set
- Wood screws and wall anchors 1 pack
- Sandpaper for smoothing edges 1 pack
- Wood stain or paint 1 small can
Step-by-Step Instructions
- 1. First, we need to figure out what we’re actually working with. Don’t just head to the hardware store and grab the first piece of wood you see because it looks “aesthetic.” Go to the lumber aisle and look for something sturdy like pine or even some reclaimed wood if you can find it. Once you’ve picked your boards, grab a tape measure and a level. You want to make sure your shelves are actually straight before you even think about drilling holes, because nothing ruins a vibe faster than a crooked shelf full of expensive candles.
- 2. Next, let’s talk about the “floating” part, which is usually where people get intimidated. Instead of buying those overpriced, pre-made floating shelf kits that feel like flimsy plastic, I prefer using heavy-duty hidden brackets or even just some thick metal L-brackets if you’re going for a more industrial look. If you want that seamless, truly floating effect, you’ll need to screw some wooden cleats directly into your wall studs. Trust me, do not skip the stud finder; if you just anchor these into drywall, your shelf—and everything on it—is going to end up on the floor.
- 3. Once your mounting hardware is ready, it’s time to prep the wood. If you’re using raw lumber, you’ll want to sand it down starting with a coarse grit and moving to a finer one until it feels smooth to the touch. I usually keep a few sheets of sandpaper in my junk drawer for this. If you want to keep it minimalist, a simple clear matte sealant works wonders, but if you’re feeling creative, you can use a leftover can of paint from a previous project. The goal is to make it look intentional, not like you just ripped it off a construction site.
- 4. Now, we actually get to the wall. Mark your spots clearly with a pencil. Use your level to draw a light horizontal line across the wall so you have a visual guide. This is the part where you might want to ask a friend for a hand holding the level while you mark, because trying to do it solo is a recipe for frustration. Once your marks are set, drill your pilot holes. This prevents the wood from splitting and makes the whole installation much smoother.
- 5. Secure your brackets or cleats into those pilot holes using the appropriate screws. If you hit a stud, you’re golden. If you’re stuck in a spot between studs, you’ll need to use high-quality drywall anchors, but honestly, aiming for the studs is always the safer, more sustainable bet for weight capacity. Give everything a little wiggle test to make sure nothing is wobbling before you move on to the final step.
- 6. Finally, slide your finished wooden boards onto the brackets. If you’re using the cleat method, you might need to notch the back of your wood slightly so it sits flush against the wall. Once it’s seated, you can add a tiny bit of museum wax or even just a small screw through the top (if you don’t mind the look) to keep it from sliding. Now, go ahead and style it, but keep it functional. Don’t clutter it up with stuff you never use; just a few plants, a couple of books, and maybe that thrifted ceramic bowl you love.
Mastering Modern Floating Shelf Design Without the Designer Price Tag

Look, you don’t need a high-end showroom catalog to achieve a clean, modern floating shelf design. The secret isn’t in the brand name; it’s in the execution. Most people fail because they try to make the shelves look “weightless” by using flimsy hardware, but that’s a recipe for a broken vase and a huge headache. If you want that seamless look, invest a little extra time into finding the right hidden shelf brackets that actually bite into the wall. It’s much better to spend an extra twenty bucks on sturdy hardware than to watch your favorite plant plummet to the floor because you tried to skip a step.
Also, let’s talk about the reality of physics. I’ve seen so many people get excited about their new setup only to realize they can’t actually put anything on it. When you’re mounting shelves to studs, you’re doing more than just hanging decor; you’re building a foundation. Always double-check your shelf weight capacity tips before you start decorating. If you aren’t hitting a stud, use heavy-duty anchors, or you’ll be staring at a hole in your drywall instead of a beautiful, minimalist display.
Finding Essential Woodworking Tools for Shelving You Already Own
Look, I get it. You see these gorgeous tutorials and suddenly feel like you need to drop three hundred bucks on a professional workshop just to hang a single piece of timber. You don’t. Most of us are working with a basic toolkit tucked in a junk drawer or a dusty corner of a closet. If you have a screwdriver, a level, and a drill, you’re already halfway there. My advice? Don’t go out and buy a specialized saw just yet. Check if you can borrow some woodworking tools for shelving from a neighbor or a friend first. Most people have a spare stud finder or a measuring tape gathering dust, and they’re usually happy to lend them out.
The real secret to making this work without a massive budget is knowing where to focus your energy. Instead of hunting for expensive, specialized hardware, focus on the basics of mounting shelves to studs correctly. That is the difference between a shelf that looks chic and one that ends up in a pile on your floor. If you can find a way to secure your supports into the wall framing, you won’t need to worry about fancy, overpriced gear to keep things steady.
Real Talk: 5 Ways to Keep Your Shelving Project from Becoming a Total Mess
- Don’t just eyeball the level. I know it feels intuitive, but if you’re off by even a tiny fraction, your books are going to slowly slide toward the floor like they’re trying to escape, and it’ll drive you crazy. Use a real level every single time.
- Check your wall type before you even buy the wood. If you’re drilling into drywall without hitting a stud, that shelf is going to end up in pieces on your floor along with whatever you put on it. If you can’t find a stud, invest in some heavy-duty anchors—don’t skimp here.
- Sanding is non-negotiable. You don’t need a professional workshop, but if you skip the sanding, your DIY project is going to look “DIY” in the worst way possible. Get it smooth so it actually feels intentional and not like a piece of scrap lumber you just slapped on the wall.
- Stop trying to match every single thing in your house. One of the biggest mistakes I see is people trying to force a shelf to perfectly match their expensive furniture. It’s okay if the wood grain is a little different; that’s what gives it character and keeps it from looking like a cheap catalog set.
- Keep your weight limits realistic. Just because a shelf looks sturdy doesn’t mean it’s a library. If you’re planning on stacking heavy cookbooks, you need to build a beefier internal support. If it’s just for a stray candle or a small plant, you can go lighter. Know your limits so you don’t have to fix it twice.
The Real Bottom Line
Don’t let “perfection” stall your progress; a slightly imperfect shelf made from reclaimed wood is way better than an empty wall because you were too intimidated to start.
Stop browsing Pinterest for expensive aesthetics and start looking at what you actually have in your garage or at the local thrift shop—functionality beats a high price tag every single time.
Invest your energy into the structural stuff, like sturdy brackets and level lines, rather than wasting money on decorative extras that don’t actually help you organize your life.
Making It Your Own
At the end of the day, building these shelves isn’t about achieving some untouchable, Pinterest-perfect aesthetic that costs three months of rent. It’s about using the tools you already have, repurposing scrap wood when you can, and finally getting that clutter off your surfaces and into a space that actually works for you. We covered how to hunt for affordable materials, how to keep the design functional rather than just “pretty,” and how to avoid the trap of buying expensive specialized gear you’ll only use once. If you follow these steps, you’ll end up with something sturdy and useful that fits your specific corner of the world without breaking your bank account.
I know that starting a DIY project can feel a little intimidating, especially if you aren’t exactly a pro with a drill. But please, don’t let the fear of a slightly crooked line stop you from making your space feel like home. Perfection is honestly kind of boring anyway; there is so much more character in a shelf that has a little bit of soul and a lot of history. My advice? Just start where you are. Grab that wood, find your level, and give it a shot. You’ll be surprised at how much better your space—and your confidence—feels once you’ve built something with your own two hands.
Frequently Asked Questions
How do I make sure these actually stay on the wall without all my books crashing down in a week?
Look, I get it. There is nothing worse than spending an entire Saturday sanding wood only to have your entire library end up in a heap on the floor. To keep things sturdy, don’t just rely on those tiny little nails. You need to find the studs in your wall—use a stud finder if you have one, or just tap the wall until it sounds solid. Use heavy-duty wall anchors if you can’t hit a stud, and honestly, just overdo it with the screws. Better to have a slightly overkill bracket than a pile of broken books.
I don't have a fancy workshop—can I really pull this off with just a basic drill and a hand saw?
Honestly? Yes. I’ve built more things in my tiny kitchen than in a real workshop, and I promise you don’t need a table saw to make this happen. A hand saw and a drill are actually the heavy lifters here. It might take a little more elbow grease and a bit more patience to get your cuts straight, but that’s part of the charm. Don’t let a lack of gear stop you from starting.
What’s the best way to finish the wood so it looks intentional and not just like a random piece of scrap?
The trick to making scrap wood look like a deliberate design choice is all in the prep and the finish. Don’t just slap some stain on and call it a day. Sand it down—really, really smooth—until the texture feels intentional. I love using a simple matte wax or a clear oil; it protects the wood without that fake, plastic-y shine you see in cheap furniture. It keeps that raw, organic vibe that actually looks high-end.







