A Beginner’s Introduction to Using a Power Drill
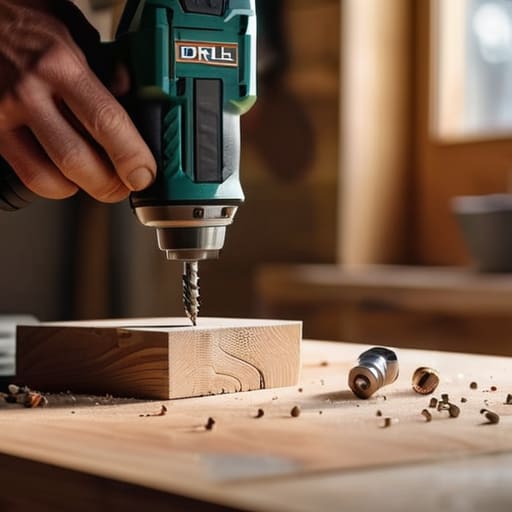
I was halfway through trying to mount a shelf in my tiny apartment last year, staring at a piece of thrifted oak and a pile of hardware, when I realized I was absolutely terrified of the loud, heavy machine sitting on my floor. I kept thinking I needed some professional-grade setup or a degree in engineering just to figure out how to use a drill without accidentally putting a hole through my neighbor’s wall. But here’s the thing: most of those “pro” tutorials make it look way more intimidating than it actually is, and honestly, you don’t need a massive, expensive toolkit to get the job done.
In this guide, I’m stripping away all the technical jargon and the performative perfection you see on DIY TikTok. I’m going to show you the actual, messy reality of getting started—from picking a basic model that won’t break your bank to the small, practical tricks that keep your projects from falling apart. We’re focusing on functional, low-stress steps so you can finally stop overthinking it and just start building. Let’s get into it.
Guide Overview
Tools & Supplies
- Power drill (cordless or corded)
- Drill bits (set containing various sizes)
- Workpiece (wood, metal, or plastic)
- Safety glasses (1 pair)
Step-by-Step Instructions
- 1. First things first, you need to pick the right bit for the job. Don’t just grab the first thing you see in the box; if you’re drilling into wood, you want a twist bit, but if you’re hitting a wall, you absolutely need a masonry bit. Using the wrong one is the fastest way to strip your screw or ruin your mood entirely.
- 2. Once you have your bit, pop it into the chuck—that’s the part at the front that opens and closes. You’ll likely need to twist it by hand or use the little key if you’re working with an older model. Make sure the bit is centered and tightly secured before you try to power anything on, otherwise, it’s going to wobble like crazy and look messy.
- 3. Before you actually pull the trigger, mark your spot. I usually use a pencil or even a tiny little dent made with a nail to show exactly where I want the hole to go. This prevents the drill bit from skating across the surface and scratching up your furniture or the wall you’re trying to fix.
- 4. Now, get your stance right. Hold the drill with both hands if you can—one on the grip and one on the back for stability. You want to apply steady, even pressure against the surface. If you push too hard, you’ll stall the motor; if you don’t push enough, the bit will just wander off and leave a jagged hole.
- 5. Go slow at the start. Instead of slamming the trigger like you’re trying to win a race, squeeze it gently to let the bit catch the material. Once you feel like you’ve made a groove and you’re on the right track, you can increase the speed a little bit to finish the job.
- 6. Keep an eye on the depth so you don’t go too far. If you’re drilling into something precious, like a thrifted dresser, I like to wrap a little piece of painter’s tape around the drill bit at the depth I want to stop. It’s a low-tech way to make sure you don’t accidentally drill straight through to the other side.
- 7. Finally, when you’re done, pull the drill straight back out of the hole. Don’t twist it while you’re withdrawing, or you’ll end up with a jagged, ugly mess. Once the hole is set, take a second to clear out any dust or debris so you can move on to the actual fun part—assembling whatever you’re working on.
Mastering Your Grip and Stance for Real Control
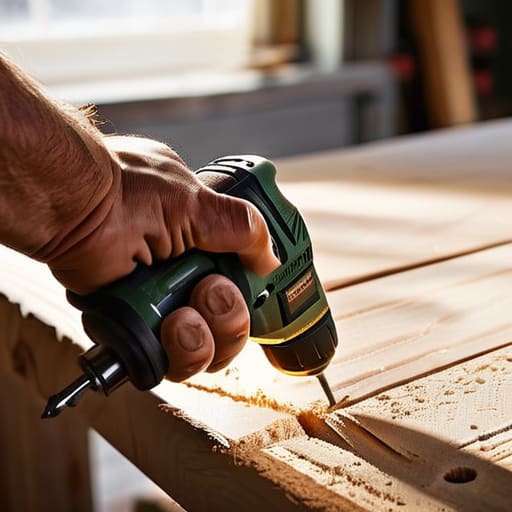
Look, you don’t need to be a professional carpenter to get this right, but you do need to stop treating your drill like a toy. If you’re standing there with your feet bunched together, you’re going to lose control the second the bit catches. I always tell my garden volunteers to plant their feet wide and lean slightly into the work. This proper drill grip and stance is what keeps you from having the tool jump out of your hands and ruin your weekend. Hold the handle firmly with your dominant hand, but use your other hand to steady the back of the drill. It feels a bit extra at first, but it’s the only way to stay steady.
Also, pay attention to how much pressure you’re actually applying. If you find yourself leaning your entire body weight into it, you’re probably doing too much. Instead, focus on steady, controlled pressure. If you’re working on a delicate thrifted find, you’ll also want to start by adjusting drill torque settings to a lower number so you don’t strip the screw or crack the wood. It’s about working with the material, not fighting it.
Essential Cordless Drill Safety Precautions for Real Life
Look, I’m not here to scare you, but let’s be real: a drill is a powerful tool, and if you treat it like a toy, it’ll bite back. Before you even pull the trigger, make sure you’re wearing eye protection. I know, it’s not the most “aesthetic” look, but getting a stray splinter or a metal shard in your eye is a quick way to ruin your entire week. Also, always double-check your workspace for clutter. I’ve learned the hard way that trying to stabilize a piece of thrifted wood while it’s sitting on a pile of old magazines is a recipe for a slip-up.
Another thing—pay attention to adjusting drill torque settings before you start. If you’re driving a screw into something delicate and your torque is set too high, you’re going to strip the screw or crack the material, and that’s just wasted money. It’s also worth noting that your approach changes depending on whether you’re drilling into wood vs metal. Wood is forgiving, but metal requires a steadier hand and a different kind of patience. Just take it slow; there’s no prize for finishing the fastest.
Pro-Tips to Save Your Walls (and Your Sanity)
- Stop guessing the depth. If you’re drilling into a wall and don’t want to go way too deep, wrap a little piece of masking tape around your drill bit at the mark where you want to stop. It’s a total lifesaver for preventing accidental holes in things you actually like.
- Don’t fight the drill; let it do the work. If you find yourself leaning your entire body weight into the tool just to get through a screw, something is wrong. You’re probably using the wrong bit or the wrong speed. Ease into it and let the motor handle the heavy lifting.
- Check your bit before you even touch the surface. There is nothing more frustrating than spending twenty minutes struggling with a screw only to realize you were using a Phillips head when you actually needed a Pozidriv. Match your bit to your screw every single time.
- Use a pilot hole for everything. I know, it feels like an extra step when you’re in a rush, but drilling a tiny little hole first prevents the wood from splitting and keeps your screw from wandering off where it shouldn’t. It makes the whole process way smoother.
- Keep your workspace clear of the “junk pile.” I’ve definitely accidentally drilled through a stray charging cable or a piece of scrap wood I thought was trash. Clear a small, dedicated spot before you start so you aren’t working in a chaotic mess.
The TL;DR: Don't Let the Tool Intimidate You
You don’t need a professional-grade, $300 kit to fix a shelf or hang some art; a basic, reliable cordless drill is more than enough to get the job done without draining your bank account.
Focus on your physical connection to the tool—if your grip is awkward or your stance is shaky, you’re going to struggle, so take a second to get comfortable before you pull the trigger.
Safety isn’t about being paranoid, it’s about being smart; keep your eyes on the bit, watch your fingers, and don’t rush the process just to say you finished.
You’ve Got This
Look, if you’re feeling a little shaky after actually pulling the trigger, that’s completely normal. We’ve covered a lot: from picking the right bit and checking your battery levels to finding that stable stance so you aren’t wobbling all over the place. Just remember that the goal isn’t to become a master carpenter overnight; it’s about using the tool correctly so you can actually finish that shelf or fix that loose cabinet without a meltdown. Keep your safety gear on, don’t force the drill if it’s slipping, and always listen to the machine—if it sounds like it’s struggling, stop and reassess.
At the end of the day, I don’t care if your first DIY project looks like a Pinterest board or a total disaster. What matters is that you didn’t wait for someone else to come over and do it for you. There is something incredibly grounding about realizing you have the agency to maintain your own space with just a few basic tools and a bit of patience. Stop waiting for the “perfect” moment or the professional-grade workshop to start building the life you want. Just grab your drill, embrace the messy middle, and start making things happen with what you have right now.
Frequently Asked Questions
Do I really need to buy a whole set of drill bits, or can I just get one or two to start?
Honestly? Do not fall for the “complete starter kit” trap. Most of those massive sets are just filler—bits you’ll use once and then lose in a junk drawer forever. If you’re just starting out, grab a small pack of multipurpose bits or even just two or three basics: a couple of wood bits and a metal one. Save that extra twenty bucks for something you actually need, like better screws or a decent screwdriver.
How do I know if I'm using too much pressure and about to strip the screw or crack the wood?
Honestly, if you feel like you’re wrestling the drill, you’re probably overdoing it. You want to lean into the tool, but don’t go full body weight on it. If the drill starts making a high-pitched whining sound or you feel the bit slipping inside the screw head, stop immediately—that’s the “stripping” warning. If the wood starts looking slightly compressed or feels soft under the bit, back off. Let the motor do the heavy lifting, not your biceps.
Is there a way to tell if a drill is powerful enough for a bigger project, or am I just wasting money on something too heavy?
Honestly, don’t get caught up in the “more power is better” trap. If you’re just hanging shelves or building a small planter, a heavy-duty industrial drill is just going to give you wrist fatigue and waste your cash. Look at the voltage—12V is great for light tasks, while 18V or 20V handles the heavy lifting. If you’re planning to drive long screws into thick timber, go for the 20V. Otherwise, keep it light.