Construct a Solid, Sturdy Desk for Less Than $100
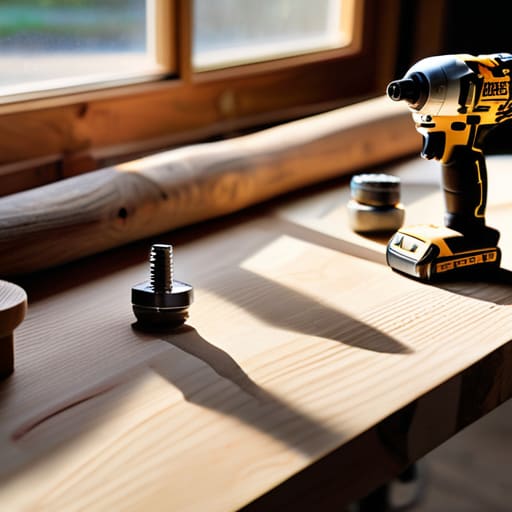
I was sitting on my floor last Tuesday, surrounded by half-empty coffee mugs and a pile of cheap, particle-board scraps that had already started to sag under the weight of my laptop. It was one of those moments where I realized that the “aesthetic” desk I saw on Pinterest was actually a total lie for anyone living in a real-world, small apartment. You don’t need to drop three months’ rent on a designer setup just to have a place to work. If you’re wondering how to build a desk that actually fits your life without draining your savings, you’re in the right place. Honestly, the secret isn’t having a professional workshop; it’s about knowing which shortcuts are actually worth taking.
In this guide, I’m stripping away all the unnecessary fluff and expensive power tools you don’t actually need. I’m going to show you how to piece together a sturdy, functional workspace using affordable materials—think thrifted finds and basic hardware store staples—that won’t wobble every time you type. We are focusing on intentional, low-cost construction that prioritizes stability over style. By the end of this, you’ll have a workspace that feels like yours, built on a budget that actually leaves you with money for groceries.
Guide Overview
Tools & Supplies
- Power Drill and bits for driving screws
- Circular Saw or Hand Saw for cutting wood
- Sandpaper for smoothing surfaces
- Measuring Tape for accurate dimensions
- Level to ensure a flat surface
- Wood planks (Tabletop) 1 unit
- 4×4 Wood posts (Legs) 4 units
- Wood Screws 1 box
- Wood Glue 1 bottle
- Wood Stain or Paint 1 can
Step-by-Step Instructions
- 1. First, we need to scout for your tabletop. Instead of heading to a big-box furniture store and dropping a paycheck on some particle board that will swell the second you spill your coffee, go check your local Facebook Marketplace or even look for a sturdy old dining table that someone is giving away. If you can find a solid wood piece that’s just a little scratched up, that’s your goldmine. I’ve found that a bit of sanding and a cheap tin of wax can make a thrifted find look like a custom piece.
- 2. Once you have your surface, you need to figure out the height. This is where people usually mess up and end up with a desk that gives them neck pain. Grab a chair you actually like sitting in, sit down at your usual working posture, and measure from the floor to your elbows. You want your desk to be just slightly lower than that so your shoulders stay completely relaxed. Don’t guess on this part; grab that notebook of mine and write the measurement down before you buy your legs.
- 3. Now, let’s talk about the base. You have two realistic options here: buying pre-made metal hairpin legs (which are super easy and look very minimalist) or repurposing something you already own. I’m a huge fan of using two small, sturdy bookshelves as the “legs” on either side. It’s a total game changer because it gives you instant storage for your notebooks and tech without needing to drill extra holes into your walls.
- 4. If you’re going the leg route, it’s time for some light assembly. Flip your tabletop upside down on a rug or a piece of cardboard so you don’t scratch the finish. Line up your legs with the corners, making sure they are perfectly centered so the desk doesn’t wobble like crazy. Use a drill if you have one, but if you’re working on a budget, a manual screwdriver works just fine—it just takes a little more muscle.
- 5. Before you flip it back over, do a quick “wobble test.” If the desk feels unsteady, don’t panic; it usually means your floor is uneven or your legs aren’t seated right. You can grab some cheap felt pads from the hardware store to shimmy out the unevenness. It’s a tiny, five-dollar fix that prevents your laptop from sliding around every time you type.
- 6. Finally, give it a little TLC. If you used an old piece of wood, a quick wipe-down with some linseed oil or even just a damp cloth will make the grain pop. Don’t feel like you need to go overboard with professional-grade stains; a lived-in look is much more forgiving and much more “you.” Set up your lamp, your plant, and your coffee, and you’re officially ready to work.
Choosing the Best Wood for Office Desks Without Breaking the Bank
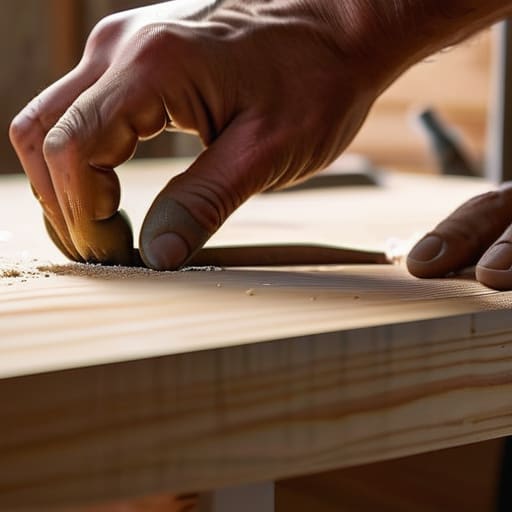
Look, I know the Pinterest boards make it seem like you need a slab of reclaimed walnut to have a “vibey” workspace, but let’s get real: your bank account probably doesn’t care about that. When you’re looking for the best wood for office desks, you don’t need to go hunting for exotic hardwoods. Honestly, a decent pine or even some high-quality plywood can look incredible if you treat it right. I’ve spent way too many weekends sanding down cheap construction lumber, and once you hit it with a good matte finish, it looks intentional and high-end rather than “budget.”
If you’re really trying to save, keep an eye out for “offcuts” at your local lumber yard or check the scrap bin at big-box stores. You can often find pieces that are perfect for minimalist desk design ideas without paying the premium for full-length boards. Just make sure you’re measuring twice so you don’t end up with a surface that’s too small for your laptop and a coffee mug. It’s all about being smart with what you can find, not how much you can spend.
Minimalist Desk Design Ideas That Fit Your Real Life
When you’re looking at minimalist desk design ideas, it’s easy to get distracted by those Pinterest-perfect setups that look like they belong in a museum rather than a real apartment. For me, a desk isn’t just a piece of furniture; it’s where I juggle copywriting deadlines and meal planning. I’ve learned that the most functional designs are the ones that don’t try too hard. Instead of chasing a specific “aesthetic,” focus on your custom desk dimensions. Measure your workspace twice—especially if you’re working in a cramped corner—to make sure you aren’t building something that eats up all your floor space.
Keep the silhouette simple to avoid clutter. A single, sturdy tabletop paired with basic trestle legs is my go-to because it’s easy to execute even if you’re just starting with basic woodworking tools for beginners. You don’t need built-in drawers or complex compartments to be productive; in fact, I find that less is usually more when it comes to staying focused. Aim for a clean surface that lets you actually breathe, and maybe leave a little room for a small plant or your notebook. If it serves its purpose and fits your budget, you’ve won.
Five things I wish I knew before I started sawing
- Don’t obsess over the “perfect” finish. If you’re using reclaimed wood or budget scraps, a few knots or slight imperfections just give the desk character. I’d much rather have a desk that looks lived-in than one that looks like a sterile showroom piece.
- Measure twice, but more importantly, measure for your actual body. Don’t just follow a random Pinterest dimension; sit in your chair, check your elbow height, and make sure the desk actually fits your workflow, not just your floor plan.
- Invest in decent sandpaper, not the cheapest pack you can find. You can save a ton of money on the wood itself, but if you skimp on the sanding, you’re going to end up with a splintery mess that ruins your notebooks and your mood.
- Skip the complicated joinery if you’re a beginner. You don’t need to be a master carpenter to make something sturdy. Simple pocket holes or even heavy-duty brackets can hold a desk together just fine without the massive headache.
- Think about your cord situation from the jump. There is nothing more frustrating than finishing a beautiful build only to realize your laptop charger is a tangled mess of wires hanging off the side. Drill a hole or add a simple tray now so you don’t regret it later.
The Bottom Line
Forget the “aesthetic” Pinterest boards for a second; prioritize a surface that’s actually sturdy enough for your laptop and a desk that fits your specific corner without costing a month’s rent.
You don’t need premium hardwoods to make something beautiful—focus on functional, affordable materials and let the character of the wood (or a little bit of sanding) do the heavy lifting.
Build for the life you actually live, not the one you think you should have. If a simple, reclaimed wood top works for your space and your budget, that is a massive win.
You Don't Need a Designer Budget
At the end of the day, building this desk isn’t about achieving some Pinterest-perfect studio setup; it’s about making a space that actually works for your real, messy, beautiful life. We covered how to pick affordable wood that won’t drain your savings, how to keep the design minimalist so it doesn’t clutter your brain, and the basic steps to get it assembled without needing a professional workshop. Remember, the goal was to create something functional and sturdy using what you could find, not to win an interior design award. If the edges aren’t perfectly sanded or the stain is a little uneven, it’s okay. That just means you actually made it yourself.
I know it can feel intimidating to pick up a tool for the first time, but I promise the payoff is so much better than just clicking “buy now” on a cheap, particle-board desk that will fall apart in six months. There is a specific kind of quiet confidence that comes from sitting down at a surface you built with your own two hands. Don’t let the fear of making a mistake stop you from starting. Just grab your materials, keep it simple, and trust the process. You’re building more than just a place to work; you’re building a sustainable way to live on your own terms.
Frequently Asked Questions
I don't own any power tools; is there a way to do this with just basic hand tools?
Honestly, don’t let a lack of power tools stop you. I’ve built more than a few things using nothing but a screwdriver, a hand saw, and some sandpaper. It takes a little more elbow grease and patience, sure, but it’s actually a great way to feel more connected to what you’re making. Just grab some pre-cut wood from the hardware store if you want to skip the sawing entirely. You’ve got this.
How do I make sure the desk doesn't wobble if I'm building it for a small, uneven apartment floor?
Look, I’ve spent way too many hours typing on desks that felt like they were on a boat. If your apartment floors are trash (and let’s be real, most are), don’t panic. First, prioritize a wide base; skinny legs are your enemy here. If it still wobbles, grab some heavy-duty felt pads or those adjustable screw-in leveling feet. They’re cheap, easy to hide, and honestly, a total lifesaver for uneven hardwood.
What's the best way to finish the wood so it actually looks decent without spending a fortune on expensive stains or sealants?
Honestly, don’t feel pressured to buy those fancy, high-end designer stains. If you want a natural look, a simple wipe-on poly or even a decent beeswax finish works wonders. I usually go for a matte sealant because it hides scratches better—which is key if you’re actually using the desk for work. Just sand it down smooth first. It’s much more about the prep work than how much you spend on the can.







