Custom Headboard Inspiration for Any Style or Budget
I used to think that having a “grown-up” bedroom meant dropping half a month’s rent on a massive, upholstered headboard from a big-box retailer. But let’s be real: most of those designs are either overpriced or look like they were mass-produced in a factory that doesn’t care about soul. When I was living in my first tiny apartment, I realized that a blank wall behind your bed just feels unfinished, yet my bank account definitely wasn’t ready for a showroom makeover. That’s why I started obsessing over diy headboard ideas that actually work for real people with real budgets. You don’t need a designer’s credit card to create a space that feels intentional and cozy; you just need a little bit of creativity and the right approach.
In this post, I’m breaking down five of my favorite ways to transform your sleeping nook without the performative perfection we see all over social media. I’ll show you how to use everything from thrifted finds to basic hardware store supplies to build something uniquely yours. Whether you’re a total beginner or a seasoned weekend warrior, these projects are designed to be functional, affordable, and actually doable in a small space. Let’s get to work.
The Thrifted Fabric Panel
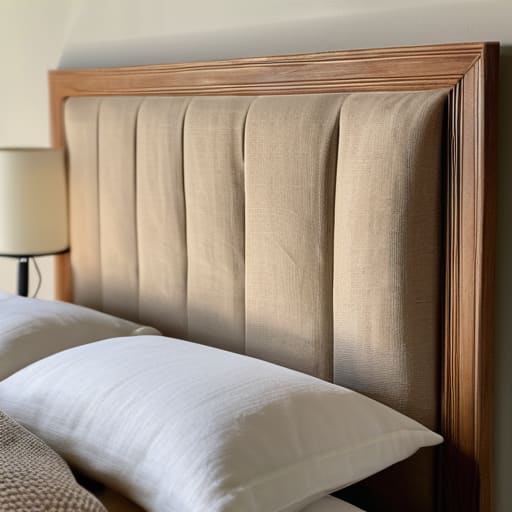
If you’re like me and find yourself constantly scouring thrift stores for textiles that actually have some soul, this is your move. Instead of buying a pre-made, stiff headboard, grab a large piece of sturdy canvas or even a heavy linen curtain you found on a clearance rack. All you need is a bit of foam padding from a craft store and some heavy-duty staples to attach it to a simple wooden frame. It gives your room that soft, intentional texture without looking like you just walked out of a big-box furniture showroom.
The Upcycled Wood Slat Look
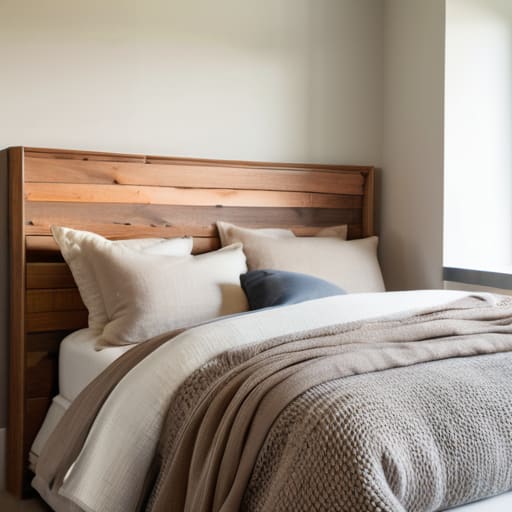
I recently found this gorgeous mid-century modern chair on a curb alert that was basically falling apart, but the wood was high quality. It got me thinking about how much character raw, reclaimed wood can add to a bedroom. You can grab some inexpensive wood slats or even leftover scraps from a local construction site and mount them vertically against the wall. It creates this architectural interest that makes a room feel grounded and cozy rather than empty and cold.
The Cozy Floor Pillow Stack
Let’s be real: sometimes a traditional headboard just feels too formal for a small, cozy apartment. If you’re working with a limited budget or just don’t have the tools to build something heavy, try the “pillow wall” approach. Get a few oversized, high-quality floor cushions or large Euro shams and stack them against the wall. It’s a low-effort, high-comfort solution that works perfectly if you spend a lot of time reading or working in bed.
The Painted Geometric Statement
This is probably the cheapest option on this list, but it can have the biggest impact if you aren’t afraid to get a little messy. Instead of building something physical, use a leftover tin of paint to create a large geometric shape—like a soft arch or a large circle—directly on the wall behind your bed. It acts as a visual anchor for the entire room, defining the sleeping area without taking up a single inch of precious floor space.
The Hanging Macramé or Tapestry
For those of us who lean a bit more into the bohemian or eclectic side of things, a heavy textile hanging is a total lifesaver. If you aren’t a pro at weaving your own macramé, just find a vintage woven rug or a thick, textured tapestry. Hang it from a simple wooden dowel or even a sturdy branch you found on a walk. It adds instant warmth and helps dampen the sound in a room, which is a huge plus if you live in a noisy apartment building.
The Bottom Line
Stop waiting for a “renovation budget” to show up; your best decor is usually hiding in a thrift store or a scrap pile.
Prioritize function over a Pinterest aesthetic—if it’s uncomfortable to lean against while you’re reading, it’s not a good headboard.
Real style is about making a space feel like yours with what you actually have, not buying a matching set just because it looks “correct” in a catalog.
Making It Your Own
At the end of the day, whether you’re repurposing an old wooden pallet, sewing together some thrifted linen cushions, or just hanging a heavy tapestry, the goal isn’t to win a design award. It’s about taking a corner of your room that feels empty and turning it into something that actually reflects who you are. We’ve looked at everything from low-effort fabric hacks to more involved woodworking projects, but the common thread is that none of them require a massive credit card limit or a professional toolkit. You just need a little bit of time, some basic materials, and the willingness to get your hands a little dirty to make something functional.
I know it can feel intimidating to start a DIY project when you aren’t “crafty,” but please don’t let perfectionism stop you from trying. Your bedroom should be a sanctuary, not a showroom for stuff you bought just because it looked good in a filtered photo. If your first attempt at a DIY headboard is a little crooked or the fabric isn’t perfectly straight, it’s okay. That’s just part of the character. Build something that feels sturdy, looks cozy, and most importantly, feels like yours. You’ve got this.
Frequently Asked Questions
I don't have a drill or a lot of power tools; are there any ways to make these that don't involve heavy construction?
Honestly, I get it. I spent most of my early twenties without so much as a screwdriver, let alone a power drill. You don’t need a workshop to make a space feel cozy. Try a “no-tool” fabric headboard using heavy-duty command strips or even just leaning a large, oversized floor cushion against the wall. You can also use tension rods or even just some sturdy twine to hang lightweight macramé or fabric panels. Keep it simple.
How do I make sure a DIY headboard actually stays attached to the bed and doesn't fall over in the middle of the night?
Honestly, there is nothing worse than waking up to your DIY project leaning against the wall like a tired toddler. If you’re using a frame, skip the command strips—they’re a lie. Use heavy-duty L-brackets to bolt the headboard directly to the bed frame. If you’re doing a floor-standing version, lean it against the wall but use some museum putty or rubber grippers on the bottom so it doesn’t slide out from under you.
If I’m using thrifted or scrap materials, how can I make sure everything is clean and doesn't smell like a basement?
Honestly, the “basement smell” is the quickest way to ruin a good thrift find. If it’s fabric, I swear by a heavy-duty steam cleaner or a soak in vinegar and baking soda—it kills the funk without needing harsh chemicals. For wood, sand it down to the raw grain to get rid of old finishes, then hit it with a good sealant. If it’s just a lingering scent, leave it outside in the sun for a few hours. Sunlight is magic.







