The Right Way to Freeze Food Without Losing Quality
I used to think that mastering how to freeze food meant I needed a hundred-dollar vacuum sealer and a collection of matching, aesthetic glass jars that would look cute in a pantry reel. But honestly? That’s just expensive performative nonsense. I spent way too many years throwing away wilted spinach and freezer-burned chicken because I was too intimidated by “proper” preservation methods or too broke to buy the fancy gear. The truth is, most of those high-end kitchen gadgets are just clutter waiting to happen, and they definitely won’t stop your leftovers from tasting like ice crystals if you don’t know the actual basics.
I’m not here to sell you on a lifestyle you can’t afford; I just want to help you stop throwing money in the trash. In this guide, I’m breaking down the real-world ways to freeze food using the containers you already have in your cupboard. We’re going to talk about what actually works, what’s a total waste of time, and how to keep your groceries fresh without needing a professional kitchen setup. Let’s get practical.
Airtight Container Methods That Actually Work
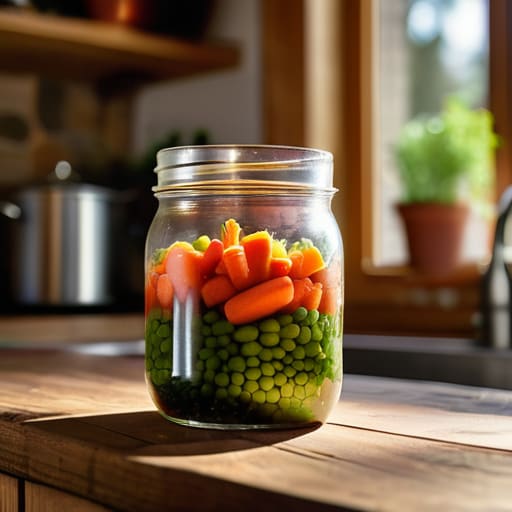
Look, you don’t need to drop a hundred bucks on a high-end vacuum sealer to keep your groceries from turning into ice blocks. I used to think I needed those fancy gadgets, but honestly, most of the time, a standard glass jar or a sturdy Tupperware you already have in the cupboard works just fine. The trick to preventing freezer burn isn’t about the price tag; it’s about getting as much air out of the container as humanly possible. If there’s a huge pocket of air sitting on top of your leftovers, that’s exactly where the frost starts to wreak havoc.
If you’re meal prepping for the freezer on a budget, I’m a huge fan of using heavy-duty freezer bags. Here’s my little hack: lay the bag flat on your counter after filling it, squeeze out every bit of air through the corner, and then zip it shut. It’s a simple way to ensure your food stays fresh without any extra gear. Just make sure you’re using bags that are actually rated for freezing, otherwise, they’ll get brittle and crack, which is a total nightmare to clean up.
Preventing Freezer Burn Without Expensive Gadgets
Look, I get it. You see those high-end vacuum sealers all over social media and feel like you’re failing at meal prepping if you don’t own one. But honestly? You don’t need a $100 gadget to master preventing freezer burn. The biggest enemy isn’t your lack of equipment; it’s the air trapped inside your packaging. If there’s air touching your food, ice crystals will form, and your expensive proteins will turn into sad, leathery scraps.
A trick I swear by when I’m freezing vegetables and fruits is the “double layer” method. If you’re using standard Ziploc bags, squeeze every bit of air out before sealing, then wrap the bag in a layer of foil or even just another plastic bag. It sounds extra, but it works. Also, if you’re freezing liquids or sauces, try using small, single-serve containers or even silicone molds. Once they’re frozen solid, pop them out and toss them into a larger bag. It’s all about minimizing contact with air using what’s already in your kitchen cabinet.
5 Real-World Rules for a Freezer That Doesn't Waste Your Money
- Don’t freeze things in massive batches. Nobody actually eats a giant, frozen block of lasagna in one sitting, and it’s a nightmare to thaw. Portion everything out into smaller, single-serving containers so you can just grab what you need for one meal and leave the rest alone.
- Label everything with a Sharpie—and I mean everything. I can never tell the difference between a bag of frozen peas and a bag of frozen spinach once they’ve been sitting in there for a week. Write the item name and the date you froze it; your future, hungry self will thank you.
- Flatten your bags. If you’re using Ziplocs, squeeze as much air out as possible and then lay them flat on a tray in the freezer until they’re solid. It saves a massive amount of space, and you can stack them like files in a drawer instead of playing Tetris with bulky containers.
- Give your liquids some breathing room. If you’re freezing soups, sauces, or even leftover coffee, remember that water expands when it freezes. Leave at least an inch of space at the top of your jar or container so you don’t end up with a cracked glass or a freezer explosion.
- Use the “First In, First Out” rule. It sounds like something from a boring warehouse, but it works. When you buy new groceries, move the older frozen stuff to the front of the shelf. It stops that random bag of mystery meat from becoming a permanent resident in the back corner of your freezer.
The Bottom Line: Keep It Simple
Stop waiting for a fancy vacuum sealer to arrive in the mail; use what you have in your kitchen right now to save your food from going to waste.
Focus on getting as much air out of your containers as possible—whether that’s with a Ziploc or a reusable tub—because air is the enemy of freshness.
Don’t aim for a Pinterest-perfect organized freezer; just aim for a system that actually prevents your hard-earned groceries from turning into ice blocks.
Don't Overthink the Process
At the end of the day, freezing food isn’t about achieving some pristine, Pinterest-perfect pantry; it’s about making sure that the money you spent at the grocery store doesn’t end up in the trash. Whether you’re using old Tupperware, squeezing the air out of a Ziploc bag, or just wrapping something tightly in foil, the goal is the same: protecting your resources. You don’t need a $300 vacuum sealer to keep your leftovers from turning into ice blocks. Just focus on getting things airtight, labeling them so you actually remember what’s inside three months from now, and being consistent with your habits rather than aiming for perfection.
I know it can feel like just one more chore on an already overwhelming to-do list, but I promise that looking into your freezer on a Tuesday night and finding a ready-to-go meal makes a massive difference. It’s a small, quiet way to be kind to your future self and your bank account. Life is messy, and your freezer is going to look a little chaotic sometimes, and that is totally okay. Stop waiting for the “perfect” organization system to arrive and just start using what you have right now. You’ve got this.
Frequently Asked Questions
How long can I actually keep things in the freezer before they start tasting like "freezer"?
Look, the “safe to eat” date and the “actually tastes good” date are two very different things. If you’re talking about meat or leftovers, I usually aim for three months. Beyond that, even if it’s technically safe, it starts picking up that weird, stale freezer flavor. For veggies or fruits, you might get a little more leeway, maybe six months, but honestly? If it’s been sitting there since last season, just let it go.
Can I just toss leftovers straight into the freezer in the same bowl they were in, or is that a recipe for disaster?
Honestly? It’s a recipe for disaster. If you toss a bowl of lukewarm leftovers straight in, you’re basically inviting freezer burn to move in and stay. The heat from the food creates steam, which turns into ice crystals—that’s the stuff that makes your food taste like cardboard later. Let it cool down on the counter first. It’s not worth the extra five minutes of waiting to save your meal from being ruined.
Is it worth it to blanch vegetables before freezing them, or can I just skip that step to save time?
Honestly? It depends on what you’re freezing. If you’re just tossing in some extra spinach or herbs for a smoothie, skip it. Life is too short for unnecessary steps. But if you’re trying to save broccoli, carrots, or green beans for dinner later, please blanch them. If you don’t, they’ll turn into mushy, weird-smelling-gray blobs in your freezer. It takes ten minutes, but it’s the difference between a decent meal and wasted money.