The Right Way to Install Shelving So It Stays Secure
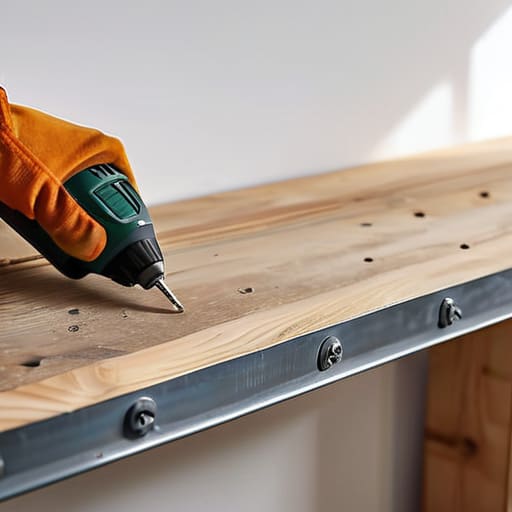
I was staring at a pile of mismatched books and a half-empty ceramic planter on my floor last Tuesday, feeling that familiar, heavy sense of clutter-induced anxiety. I knew exactly where they belonged, but the empty patch of wall above my thrifted desk felt like a personal challenge I wasn’t prepared to face. Most DIY tutorials make it seem like you need a workshop full of power tools and a degree in engineering just to figure out how to install a shelf without it collapsing the second you add a single candle. Honestly? It’s usually just a matter of knowing which holes to avoid and not overthinking the aesthetics before you’ve even touched a drill.
I’m not here to sell you on some expensive, professional-grade mounting system that costs more than the shelf itself. Instead, I want to show you how to get this done using the basic tools you probably already have tucked away in a junk drawer. We’re going to skip the performative perfection and focus on the actual mechanics of finding a stud, leveling things out, and making sure your new setup is actually functional for your real, messy life. Let’s get your stuff off the floor.
Guide Overview
Tools & Supplies
- Drill/Driver for creating holes and driving screws
- Level to ensure the shelf is straight
- Measuring tape for accurate placement
- Pencil for marking drill points
- Shelf and brackets (1 set)
- Wall anchors and screws (1 pack)
- Wall stud finder (1 unit)
Step-by-Step Instructions
- 1. First, you need to figure out what you’re actually putting on this shelf. There is no point in doing all this work if you’re just going to hang a single, tiny succulent on it. If you’re planning on stacking heavy cookbooks or a collection of thrifted ceramics, you’re going to need to find the studs in your wall. Grab a stud finder (or just knock on the wall until it sounds solid) because mounting directly into the wood is the only way to ensure your stuff doesn’t end up in a heap on the floor.
- 2. Once you know where the support is, grab a pencil and mark your spots. I know, it feels tedious, but measure twice and cut once is a rule for a reason. If you’re using brackets, mark the holes where the screws will go. If you don’t have a level, don’t just wing it—your eyes will lie to you, and you’ll end up with a shelf that looks like it’s sliding into another dimension. Use a cheap spirit level or even a leveling app on your phone to keep things straight.
- 3. Now, let’s talk about the actual drilling. If you’re lucky enough to hit a stud, you can just screw your brackets right in. If you’re dealing with drywall and no stud in sight, you must use drywall anchors. Don’t skip this step to save five minutes; those little plastic sleeves are the only thing standing between your shelf and a very expensive mess. Drill your pilot holes carefully, and try not to go too deep or you’ll end up drilling straight through to the other side of the wall.
- 4. Hammer those anchors into the holes until they are flush with the wall. Give them a little tap to make sure they’re seated firmly. If they feel wobbly now, they’re definitely going to fail once you add weight, so just pull them out and try again. It’s better to spend an extra ten minutes getting the foundation right than to spend your entire weekend cleaning up plaster dust and broken glass.
- 5. Line up your brackets with the anchors and drive your screws in. I usually do this by hand with a screwdriver rather than a power drill just to feel the tension. You want them tight, but don’t go overboard and strip the screw head or crack the drywall. Once the brackets are secure and don’t wiggle when you give them a firm tug, you’re officially in the home stretch.
- 6. Set your shelf on top of the brackets and secure it. Most shelving kits come with tiny little screws to attach the wood to the bracket—make sure you use them. This stops the shelf from sliding forward when you go to grab something. Finally, give the whole thing a gentle shake. If it feels solid, go ahead and add your things, but maybe start with the lighter stuff first until you’re totally confident it’s holding up.
The Essential Tools for Shelving You Actually Need
Look, I’ve been there—standing in the middle of a hardware store aisle feeling like I need to buy half the building just to hang one piece of wood. You don’t need a professional workshop. Most of the time, you just need the basics: a drill, a level, and a pencil. But if you want to avoid the heartbreak of your plants crashing to the floor three days later, you have to prioritize finding wall studs first. If you can hit that solid wood behind the plaster, you’re golden. If not, don’t panic; just make sure you grab some decent wall anchors for heavy loads instead of those flimsy plastic ones that feel like they’ll snap if you even look at them wrong.
I also can’t stress enough how much of a difference a cheap level makes. I used to just “eyeball it” because I was too lazy to find my level, and let me tell you, a crooked shelf is a special kind of mental torture. Whether you’re dealing with standard drywall or the nightmare of drilling into masonry, just take the extra five minutes to prep. It’s better to spend a little extra effort now than to spend your entire weekend patching holes in your wall later.
Finding Wall Studs Without Buying Fancy Gadgets
Look, I get it. You see those sleek electronic stud finders at the hardware store and think, “Yeah, that’ll make this easy.” But honestly? Most of them are overpriced, finicky, and usually give you a false reading right when you’re about to commit to a permanent hole in your wall. If you want to save a few bucks and avoid the headache, just go old school.
Start by tapping the wall with your knuckles. You’re listening for a change in sound—a hollow “thud” means you’re in the empty space between studs, while a solid, duller sound usually means you’ve hit something substantial. If you want to be extra sure, grab a strong magnet. Since drywall is basically just paper and gypsum, a magnet will snap right onto the metal screws or nails that hold the drywall to the wood frame. It’s a low-tech way of finding wall studs that works every single time. Once you’ve located that solid spot, you can breathe a sigh of relief knowing your shelf isn’t going to end up on the floor by next Tuesday.
5 Ways to Avoid a DIY Disaster
- Don’t trust your eyes alone; use a level even if you think you’re “just eyeballing it.” There is nothing more soul-crushing than realizing your favorite plant collection is slowly sliding toward the floor because your shelf is tilted two degrees to the left.
- Test your weight limit before you get attached. I know a shelf that looked gorgeous in a catalog, but once I put my heavy vintage cookbooks on it, the whole thing bowed like it was tired of existing. Know what you’re putting on it before you drill.
- Keep your “junk drawer” supplies handy. If you’re mounting something light, you don’t need a heavy-duty construction kit—just check if you have some basic drywall anchors tucked away somewhere. It saves you a trip to the hardware store and ten bucks you’ll wish you had for groceries.
- Mind the wires. It sounds obvious, but double-check that you aren’t drilling directly into a power line or a pipe. I’ve seen enough “oops” moments to know that a little extra caution is better than a flooded apartment or a blown fuse.
- Embrace the imperfection. If the hole is a little wonky or the screw isn’t perfectly flush, don’t spiral. It’s a shelf, not a museum exhibit. As long as it holds your stuff and doesn’t fall on your head, you’ve won.
The Bottom Line
Don’t let the “perfect” setup intimidate you; if you have a level, a screwdriver, and a basic sense of where your studs are, you’re already halfway there.
Prioritize function over aesthetics by using the hardware you already have in your junk drawer before you go out and spend money on a specialized kit you’ll only use once.
Remember that it’s okay if it isn’t Pinterest-perfect on the first try—the goal is a sturdy shelf that holds your stuff, not a museum display.
Don't Let the Dust Settle
At the end of the day, hanging a shelf isn’t about achieving some Pinterest-perfect, showroom-ready look; it’s just about making your space work for you. You don’t need a professional contractor or a garage full of expensive power tools to get this done. As long as you’ve located your studs, used the right screws for the weight you’re planning to hold, and kept your level handy, you’ve already done the hard part. Remember, it’s perfectly okay if it’s a little bit crooked or if the hardware doesn’t look like it came from a high-end boutique. The goal was to create functional storage using what you already have, and if you’ve managed to get those books or plants off the floor and onto the wall, you’ve officially won.
I know that staring at a blank wall and a box of hardware can feel a bit overwhelming, especially when you’re already juggling a million other things. But there is something so deeply satisfying about fixing something with your own two hands. It turns a house into a home that actually reflects your life, rather than just a space you’re passing through. Don’t wait for the “perfect” moment or the “perfect” budget to start making your environment better. Just grab that screwdriver, find a spot that needs some love, and just start building. You’ve totally got this.
Frequently Asked Questions
What do I do if I can't find a stud exactly where I want the shelf to go?
Look, if your dream shelf placement is sitting right in a dead zone between studs, don’t panic and don’t try to force it with just regular screws—that’s how things end up in pieces on your floor. Just grab some heavy-duty drywall anchors. I usually go for the screw-in zinc ones; they’re cheap and way more reliable than those flimsy plastic plugs that always seem to spin in circles. It’s not as “perfect” as hitting a stud, but it works.
Is it actually safe to hang heavy books on a shelf held up by drywall anchors alone?
Honestly? No. If you’re planning on stacking heavy hardcovers or those massive art books, relying solely on drywall anchors is a recipe for a midnight disaster. Anchors are fine for a small succulent or a framed photo, but they’ll eventually pull right out of the gypsum. If you can’t hit a stud, grab some heavy-duty toggle bolts instead. They’re cheap, they work, and they won’t leave your books in a pile on the floor.
How can I tell if my wall is too weak or made of a material that won't hold weight without spending a fortune on a tester?
Honestly, you don’t need a professional sensor for this. Just give the wall a quick tap with your knuckle—if it sounds hollow and feels like it’s vibrating, you’re likely looking at drywall or plaster, which means you must find a stud or use heavy-duty anchors. If it feels solid and dead, it’s probably masonry. If you’re really unsure, just grab a tiny finishing nail and tap it in; if it meets resistance immediately, you’re golden.







