The Secret to Applying Caulk Like a Professional Without the Mess
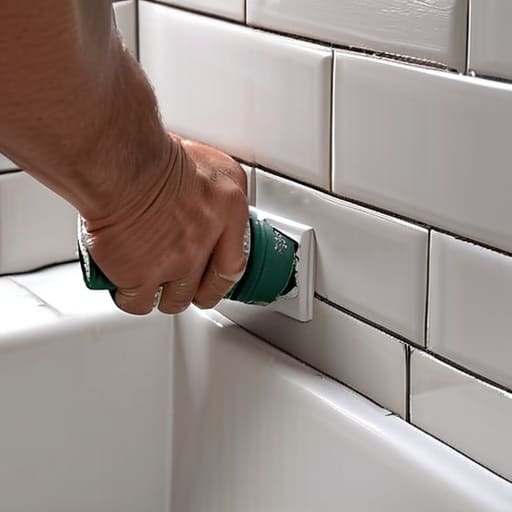
I was staring at a soggy, peeling mess around my kitchen backsplash last Tuesday, wondering why I’d spent forty dollars on a “professional grade” sealant that looked like a toddler had tried to draw a straight line with a tube of toothpaste. We’ve been sold this idea that you need expensive, high-tech tools or a contractor on speed dial to fix basic household leaks, but honestly? That’s just a way to drain your bank account. Learning how to caulk isn’t about achieving some Pinterest-perfect, seamless finish that looks like it was installed in a showroom; it’s about making sure the water stays where it belongs so your apartment doesn’t end up with mold issues.
I’m not here to give you a lecture on architectural precision or sell you on a ten-step system that requires a workshop. Instead, I’m going to show you the actual way to do this using the basic supplies you can find at any local hardware store. We’re going to talk about the steady hand tricks I’ve learned from years of DIYing in small spaces, how to avoid the mess, and how to get a functional bead without the stress. Let’s get this done so you can get back to your actual life.
Guide Overview
Tools & Supplies
- Caulking gun for applying the sealant
- Caulk removal tool or utility knife for cleaning old residue
- Wet rag for smoothing and cleaning excess material
- Caulk tube (silicone or acrylic depending on surface)
- Painter's tape for clean edges (optional)
Step-by-Step Instructions
- 1. First things first: you have to clean out the old mess. If you’re trying to caulk over crusty, peeling old silicone, it’s going to fail, and you’ll just be wasting money on more supplies. Grab a putty knife or even an old credit card you don’t care about anymore and scrape it all away. If there’s stubborn residue left, a little bit of rubbing alcohol on a rag will do the trick to get the surface truly clean.
- 2. Once the junk is cleared out, make sure everything is bone dry. This is the part where people rush and end up with a moldy disaster three months later. If you’re working in a bathroom, maybe run a hairdryer over the area for a minute or just give it a solid hour to air out. Any moisture trapped underneath is basically an open invitation for mildew to move in.
- 3. Now, let’s talk about the tape trick. If you aren’t feeling particularly confident in your steady hand (and let’s be real, most of us aren’t), grab some painter’s tape. Apply a strip of tape to both sides of the gap you’re filling, leaving just enough space for the caulk to sit in the middle. It feels a little extra, but it’s the easiest way to get those crisp, straight lines without the stress.
- 4. Prep your caulk gun. Cut the tip of the tube at a slight angle—think of it like a tiny, slanted nozzle rather than a blunt hole. This helps the flow stay consistent. When you start applying, don’t try to do the whole length in one massive go. Instead, work in small sections, squeezing the trigger with steady, even pressure as you move along the gap.
- 5. This is the part that feels a bit messy but is actually the most important: the smoothing. Take a damp finger (or a dedicated caulking tool if you want to feel fancy) and lightly run it along the bead you just laid down. You aren’t trying to smear it everywhere; you’re just pressing it into the crevice and leveling it out. If you used the tape method, peel it back slowly while the caulk is still wet to avoid pulling the bead out of place.
- 6. Finally, just leave it alone. This is the hardest part for me because I always want to poke at it to see if it’s dry, but resist the urge. Check the tube for the specific cure time—usually, you want to wait at least 24 hours before getting it wet. Let it do its thing, go grab a coffee, and trust the process.
Ditch the Old Mess Removing Old Caulk Like a Pro
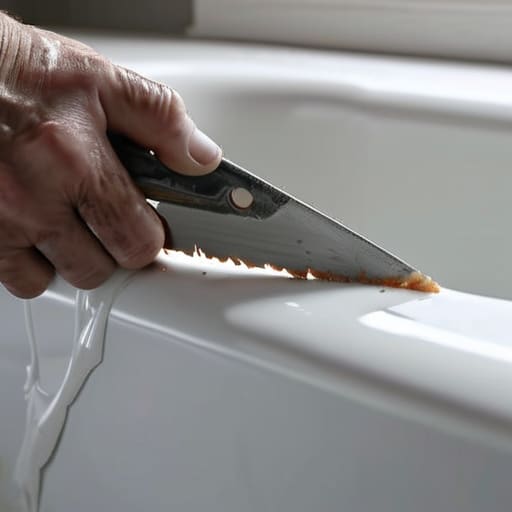
Look, I know the temptation to just smear new sealant right over the old, crusty stuff to save time, but please—don’t do it. If you don’t commit to removing old caulk completely, the new layer won’t bond, and you’ll be right back in this same mess in three weeks. It’s frustrating and tedious, I get it, but it’s the only way to ensure you’re actually sealing your surfaces rather than just painting over a disaster.
Grab a utility knife or a specialized caulk removal tool—I usually hunt for these at the thrift store or keep a sharp one in my junk drawer—and carefully slice along the edges. You want to peel it away in strips without gouging the actual tub or tile. Once the bulk is gone, take a damp cloth or a bit of isopropyl alcohol to wipe away the leftover residue. Getting the surface completely clean and dry is the real secret to a long-lasting seal. If you’re sealing bathroom fixtures, this step is non-negotiable if you want to avoid that nasty black mold creeping back in through the cracks.
Silicone vs Acrylic Caulk Choosing What Actually Works
Look, walking into the hardware aisle can feel like a trap. You’re staring at a wall of tubes, and half of them look exactly the same. But choosing the wrong one is how you end up having to redo the whole job in three months. If you’re sealing bathroom fixtures or anything that’s going to get constantly hit with water and steam, you need silicone. It’s waterproof, flexible, and basically indestructible once it sets. The downside? It’s a bit of a nightmare to clean up if you mess up, so you have to be intentional with your application.
On the other hand, acrylic is your best friend for things like caulking around windows or smaller cracks in baseboards where water isn’t a constant threat. It’s way easier to work with and you can even paint over it if you want to match your wall color—which is a total lifesaver if you’re trying to hide a DIY mistake. Just don’t use it in the shower unless you really want to deal with leaks later. Pick the tool that actually fits the job, not just the cheapest one on the shelf.
Pro-Tips to Save Your Sanity (and Your Seal)
- Don’t skimp on the painter’s tape. If you aren’t confident in your steady hand, just tape off both sides of the gap. It takes an extra five minutes, but it beats spending an hour scrubbing dried, ugly blobs off your tiles.
- Keep a spray bottle of soapy water nearby. Once you lay down your bead, lightly misting it with a mix of water and a tiny drop of dish soap helps smooth everything out without you smearing the caulk everywhere with your fingers.
- Less is actually more. You don’t need to pile it on like frosting a cake; just aim for a consistent, thin line. Overloading it just creates a mess that takes forever to dry and eventually peels away anyway.
- Patience is your best friend here. I know you want to jump in the shower or scrub the sink immediately, but if you disturb it while it’s still tacky, you’re basically starting from scratch. Give it the full drying time the tube suggests.
- Check your surface temperature. If you’re working in a freezing garage or a super humid bathroom, the caulk might behave weirdly. Try to do your repairs when the room is at a normal, comfortable temperature so it adheres properly.
The Bottom Line: Don't Let the Fear of a Messy Seal Stop You
Prioritize function over perfection; as long as you have a steady, continuous bead that keeps water out, you’ve won the battle.
Spend the extra ten minutes cleaning the surface properly before you start, because even the best caulk in the world won’t stick to old grime or leftover residue.
Buy the right tool for the specific job—silicone for the wet stuff like showers, and acrylic for everything else—so you aren’t wasting money on a product that’s going to peel in a month.
The Final Seal
At the end of the day, caulking isn’t about achieving some Pinterest-perfect, flawless line that looks like it was applied by a machine. It’s about the practical reality of protecting your space. You’ve cleaned the surface, picked the right material—hopefully that silicone we talked about—and you’ve managed to get a steady bead down without making a complete mess. If it’s a little uneven, it’s okay. As long as you’ve created a solid, water-tight barrier that keeps mold from creeping into your walls and prevents your budget from going down the drain due to water damage, you have done your job. Focus on the functionality over the aesthetic, and you’ll realize that a slightly imperfect seal is a thousand times better than a gaping hole.
I know DIY projects can feel intimidating, especially when you’re staring at a messy tub or a leaky backsplash, but don’t let the fear of a “bad job” stop you from maintaining your home. We spend so much time scrolling through videos of people with massive budgets and professional toolkits that we forget the most important part of home care is just showing up. You don’t need a renovation crew; you just need a little patience and the willingness to get your hands a bit dirty. Take it one seam at a time, trust your hands, and remember that progress is better than perfection. You’ve got this.
Frequently Asked Questions
Can I just layer new caulk over the old stuff if it’s not peeling, or is that just asking for a mess later?
Look, I get the temptation. It feels like a shortcut, but honestly? You’re just asking for a headache later. If you layer new caulk over the old, it won’t actually bond to the surface—it’ll just sit there like a heavy, expensive skin. Eventually, it’ll peel, crack, and look even messier than what you have now. Do yourself a favor: scrape the old stuff out first. It’s extra work now, but it saves you from doing this twice.
How long do I actually have to wait before I can get the shower running without ruining everything?
Look, I get it—you just finished a DIY project and you’re dying to jump in that shower. But please, don’t rush it. If you’re using silicone, give it at least 24 hours before letting any water touch it. If you’re using acrylic, you might be able to get away with a few hours, but honestly? Waiting a full day is the safest bet. It’s better to shower lukewarm at the sink tonight than to deal with a moldy, peeling mess tomorrow.
Is there any way to fix it if I accidentally make a huge, ugly blob that looks nothing like a smooth line?
Look, we’ve all been there. You’re trying to be precise, and suddenly you’ve got a giant, gummy mess staring back at you. Don’t panic and don’t try to smooth it out with your finger—that usually just makes it look even more chaotic. If it’s still wet, grab a damp rag and gently wipe the excess away. If it’s already dried? You’ll have to scrape it off and start that section over. It’s annoying, but way better than living with a permanent eyesore.







