Weatherstrip Your Doors to Save Money on Heating and Cooling
I was sitting on my floor last Tuesday, wrapped in a literal blanket and nursing a lukewarm tea, wondering why my apartment felt more like a walk-in freezer than a home. There it was: that tiny, annoying draft slicing right through the bottom of my front entrance. I realized I’d been paying a “heating tax” to the wind for months because I thought weatherstripping a door was some high-level construction project that required a professional contractor and a massive budget. Honestly, it’s one of those expensive myths that keeps us from actually fixing our living spaces.
The truth is, you don’t need a toolkit full of specialized gear or a weekend-long renovation to stop the chill. In this guide, I’m breaking down the actual, low-cost ways to seal those gaps using stuff you can grab at any local hardware store for a few bucks. I’ll show you exactly how to identify where the air is leaking and how to get the job done without the performative perfection or the headache. Let’s just get your space feeling cozy and keep your money in your pocket where it belongs.
Guide Overview
Tools & Supplies
- Measuring tape for determining door perimeter
- Utility knife for trimming excess material
- Screwdriver for securing door sweeps or hardware
- Weatherstripping roll or strips (adhesive or screw-on)
- Door sweep (one per door)
- Cleaning solution or rubbing alcohol to prep surface
Step-by-Step Instructions
- 1. First, you need to do a little “audit” of your door. Grab a flashlight and a piece of paper, or just use your hands to feel for where the drafts are actually coming from. I usually do this at night when it’s quiet so I can really feel the air moving. Check the sides, the top, and especially that annoying gap at the bottom. If you can see light coming through the cracks when the door is closed, you’ve found your culprit.
- 2. Once you know where the leaks are, you have to clean the surface. This is the part everyone skips, but if you don’t, the new adhesive is going to peel off in a week and you’ll be right back where you started. Grab some rubbing alcohol and a microfiber cloth to wipe down the door frame where the stripping will sit. Make sure it’s completely dry before you move on; any leftover dust or oils are basically a death sentence for your DIY work.
- 3. Now, head to the hardware store—but don’t let them upsell you on the “premium” stuff. You just need basic foam tape or V-seal strips that match the size of your gap. I always recommend getting a little more than you think you’ll need because mistakes happen, and it’s better than having to drive back halfway through the project. Look for something that feels slightly compressible so it actually creates a seal when the door shuts.
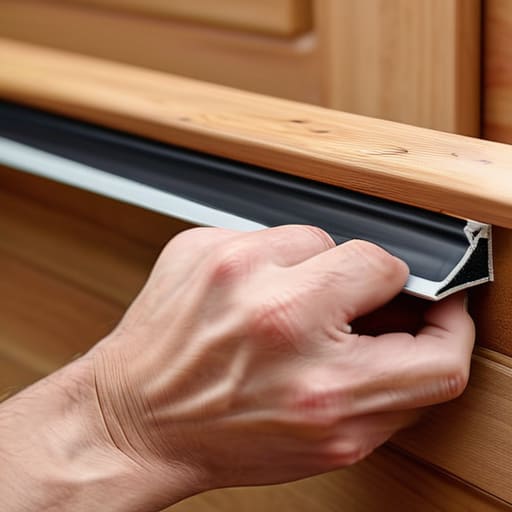
- 4. Start applying your weatherstripping, beginning at the top corner. If you’re using adhesive tape, peel back just an inch or two at a time rather than the whole thing at once. This prevents the strip from getting tangled or stuck in the wrong place. Press down firmly as you go to make sure the bond is tight. If you’re doing the sides, try to keep the lines straight so the door doesn’t catch on the material when you open it.
- 5. For the bottom of the door, you’re likely looking at a door sweep rather than just tape. This is usually a strip of metal or plastic with a rubber fin that screws into the bottom of the door. Measure the width of your door carefully—measure twice, cut once—and use a hand saw to trim the sweep to size. Screw it into place, making sure it’s flush against the threshold so it creates a solid barrier against the wind.
- 6. The final step is the “test run.” Close your door and check the seal. If you still feel a draft, you might need to add another layer or adjust the placement of your strips. Don’t be afraid to tweak things until it feels right. Once you’re satisfied, give the strips a firm press one last time to ensure they’ve fully adhered. Now you can actually sit in your living room without feeling like you’re standing in a wind tunnel.
Picking the Right Types of Door Weatherstripping Materials Without Overspen
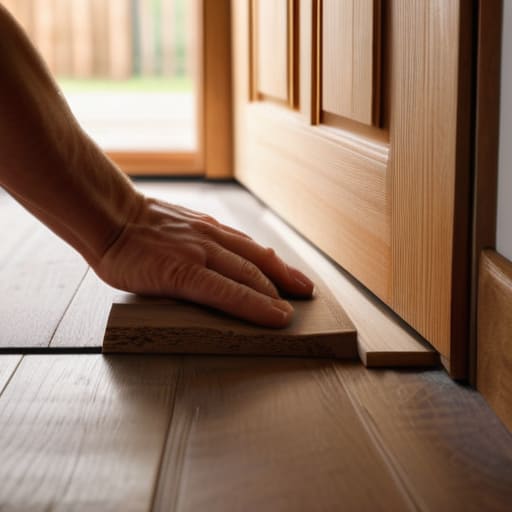
Look, you don’t need to wander down the hardware aisle and get paralyzed by every shiny, high-tech roll of foam you see. Most of those “premium” options are just marketing fluff designed to drain your bank account. When you’re looking at the different types of door weatherstripping materials, keep it simple: if you’re sealing the sides and top, a basic adhesive foam or V-strip works wonders. But if you’re dealing with that massive gap at the base of the door, skip the flimsy tape and invest in a decent sweep. A solid door bottom seal installation is honestly the single best way to stop that annoying draft from hitting your ankles every time the wind picks up.
I always tell my garden crew the same thing: don’t buy it just because it looks fancy in the packaging. Check the material—silicone lasts longer and handles temperature swings better than cheap foam, which can crumble after one harsh winter. It’s one of those small energy efficient home improvements that actually pays for itself in a few months by reducing heating costs with door seals. Just grab what fits your specific gap and move on with your life.
Mastering Door Jamb Sealing Techniques to Stop Those Annoying Drafts
Once you’ve picked out your materials, the real work starts with the actual application. I’ve learned the hard way that if your alignment is even slightly off, you’re basically just taping a useless piece of rubber to your wall. When you’re working on your door jamb sealing techniques, don’t just slap the adhesive on and hope for the best. Clean the surface with a bit of rubbing alcohol first—I know, it sounds extra, but if there’s any dust or old residue, that seal is going to peel off in a week. You want that material to grip the wood like it’s part of the house.
Also, don’t forget about the gap at the very bottom. Even if your jambs are perfectly sealed, a rogue draft will still sneak in under the door. This is where door bottom seal installation becomes a total game-changer for your utility bill. It’s one of those small, low-effort energy efficient home improvements that actually delivers. If you can feel a breeze when you walk near the threshold, you aren’t finished yet. Tighten up those edges, and you’ll finally be able to actually feel the temperature difference in your room.
5 Real-World Hacks to Keep the Draft Out (and Your Cash in Your Pocket)
- Don’t just guess where the air is getting in; grab a lighter or a single incense stick and move it slowly around the door frame on a windy day. When the flame flickers or the smoke dances, you’ve found your culprit. It’s way more effective than just blindly slapping foam everywhere.
- If you’re dealing with a gap at the very bottom of the door, don’t feel like you need to buy a high-end, permanent door sweep right away. A heavy, fabric draft stopper—the kind you can just roll up and shove against the base—works wonders and costs basically nothing if you make one from an old pair of thick socks or a thrifted fabric scrap.
- Clean your door frames like your life depends on it before you stick anything to them. I know, it sounds tedious, but if you apply weatherstripping over layers of old dust or greasy residue, it’s going to peel off in a week. Use some cheap rubbing alcohol to wipe the surface down so the adhesive actually stays put.
- Check your door’s alignment before you start buying supplies. Sometimes the “draft” is actually just a door that’s sagged on its hinges. A quick tighten of the screws on your top hinge can sometimes solve a gap problem more effectively than any fancy rubber seal ever could.
- Avoid the temptation to buy those massive, “all-in-one” weatherproofing kits from the big-box stores. They usually include a bunch of stuff you won’t use and the quality is hit-or-miss. Just buy exactly what you need—whether it’s a roll of V-seal or some adhesive foam—and save that extra ten bucks for your grocery budget.
The Bottom Line: Save Your Money and Your Heat
Don’t feel pressured to buy the most expensive, high-tech sealing kits; a basic roll of foam or some decent adhesive stripping works just as well if you apply it carefully.
Focus your energy on the gaps where you actually feel the draft—usually the bottom of the door or the corners of the jamb—rather than trying to overhaul the entire frame at once.
Consistency is better than perfection; it’s better to do a quick, functional seal today with what you have than to wait months for a “perfect” DIY project that never happens.
The Bottom Line on Beating the Draft
At the end of the day, weatherstripping isn’t about turning your apartment into a high-tech laboratory; it’s just about being smart with your resources. We’ve covered everything from picking the right foam or V-seal to making sure those door jambs are actually tight. If you’ve done the work to seal those gaps properly, you’ve already done the heavy lifting. You don’t need a massive renovation budget to stop feeling that freezing chill every time the wind picks up. Just remember that the goal is functional efficiency, not perfection. If there’s still a tiny bit of air moving, don’t sweat it—as long as you’ve closed the main leaks, you’re already winning the battle against your heating bill.
I know that DIY projects can feel like just another thing on an already overwhelming to-do list, but I promise this one is worth the effort. There is something so incredibly grounding about taking a small, tangible problem and fixing it with your own two hands. It’s a way of reclaiming your space and making it work for you, rather than the other way around. You’re building a home that is actually sustainable and comfortable, one small seal at a time. So, grab your notebook, check your budget, and just get started. You’ve totally got this.
Frequently Asked Questions
Is it actually worth the effort to weatherstrip my front door if it’s already pretty old and slightly warped?
Honestly? It depends on how much that warp is bothering you. If the door is so wonky that you can see daylight through the cracks no matter what, weatherstripping might just be a band-aid on a bigger problem. But, if it’s just a slight tilt, don’t toss the whole door yet. Grab some thicker foam tape or a heavy-duty door sweep. It’s a cheap way to see if you can salvage it before spending big.
How do I know if I should use adhesive foam strips or the actual rubber bulb seals for my specific door type?
Honestly, it comes down to how much “squish” your door needs. If you’ve got a standard interior door that just has a tiny gap, adhesive foam is cheap and easy. But if it’s an exterior door facing the wind, go with the rubber bulb seals. They’re more durable and actually create a real barrier against the elements. Foam is fine for a quick fix, but rubber is what actually stops the draft long-term.
Will all this extra sealing make my door harder to close or cause it to stick once the temperature changes?
That’s a fair concern—the last thing I want is to spend an afternoon sealing a door only to have it jam shut the second the humidity hits. It can happen if you go overboard with thick foam. My rule of thumb? Test the seal by closing the door halfway while you’re applying the strip. You want a snug fit that resists air, not a struggle that requires a shoulder nudge to shut.