A Fun Weekend Project: Building a Birdhouse With Your Children
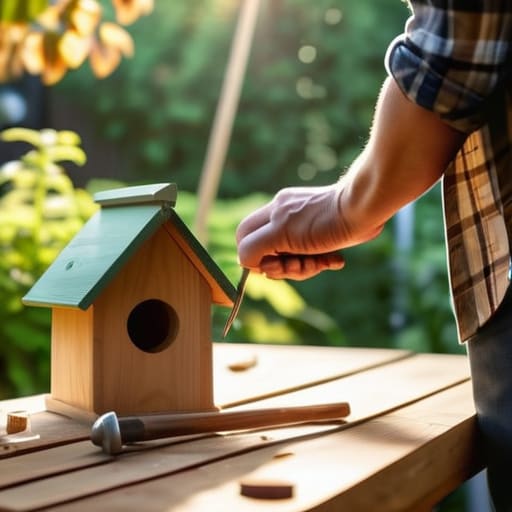
I was sitting on my fire escape last Tuesday, staring at a pile of discarded cedar scraps I’d rescued from a neighbor’s renovation, when I realized how much pressure we put on “crafting.” You don’t need a workshop full of power tools or a $50 kit from a big-box store to make something meaningful for the local ecosystem. Honestly, most of the tutorials online make learning how to build a birdhouse look like a high-stakes engineering project, but that’s just performative DIY. If you’re waiting until you have the “perfect” tools or a pristine backyard to start, you’re missing the point of actually connecting with the space you live in.
In this guide, I’m skipping the fluff and showing you how to build a sturdy, functional birdhouse using nothing but basic hand tools and the stuff you probably already have in your garage or junk drawer. We aren’t aiming for Pinterest-perfect aesthetics here; we are aiming for real-world utility that actually helps our feathered neighbors thrive. I’ll walk you through selecting the right wood, keeping it budget-friendly, and making sure it’s positioned so it actually works. Let’s get messy and build something that actually lasts.
Guide Overview
Tools & Supplies
- Hand saw or miter saw for cutting wood
- Hammer for assembling pieces
- Drill with spade bit for entrance hole
- Measuring tape for accurate dimensions
- Cedar or pine board (1" x 6" x 4')
- Galvanized nails (1.5 inch)
- Wood glue (exterior grade)
- Sandpaper (medium grit)
Step-by-Step Instructions
- 1. First, let’s talk about the wood. Please, for the love of everything, do not go out and buy a massive slab of expensive mahogany just for a birdhouse. I once spent way too much on a “premium” project only to realize it was a total waste of money. Instead, scavenge for scrap wood from an old crate, a leftover piece from a DIY shelf, or even some untreated cedar from a local construction site. Just make sure it’s not pressure-treated with those nasty chemicals, because we actually want the birds to be safe and healthy.
- 2. Once you’ve got your scraps, grab a saw and some basic measurements. You don’t need a blueprint from an architect; you just need a floor, four walls, and a roof. Aim for a floor that’s about 5×5 inches and walls that are roughly 8 inches high. If your cuts aren’t perfectly straight, don’t panic. The birds aren’t going to grade your craftsmanship, and a little bit of character actually makes it look less like a mass-produced plastic piece of junk from a big-box store.
- 3. Now, let’s tackle the entrance hole. This is the most important part because it determines who moves in. If you make the hole too big, you’re basically inviting predators or aggressive sparrows to take over. For most small backyard birds, a 1.5-inch diameter hole is usually the sweet spot. Use a drill or even a small hand saw to carefully carve it out. Just remember: no perch needed. Seriously, perches actually make it easier for predators to hang on while they try to get to the eggs, so skip that unnecessary step.
- 4. It’s time to put the pieces together. Grab some galvanized nails or even some outdoor-rated screws if you have them. I usually use a hammer and a few small nails, but if you’re worried about splitting the wood, pre-drill some tiny pilot holes first. It takes an extra minute, but it saves you the headache of a cracked board halfway through. Try to keep the joints tight enough to keep the wind out, but don’t stress about making it look like a museum exhibit.
- 5. For the roof, I like to make it slightly wider than the base so it creates an overhang. This acts like a little porch that keeps the rain from soaking the entrance. If you have any leftover shingles or even just a piece of old tin, you can slap that on top to make it extra waterproof. Just make sure the roof is securely attached so a heavy storm doesn’t turn your hard work into a pile of debris on the lawn.
- 6. Finally, skip the toxic, bright-colored paints. I know, it’s tempting to make it look “aesthetic,” but we’re building a home, not a piece of pop art. If you really feel the need to decorate, use a light-colored, non-toxic exterior stain or just let the natural wood weather over time. Hang it up in a quiet spot—maybe a bit of shade if you can find it—and then just sit back and let nature do its thing.
The Cedar Wood Birdhouse Project Using What You Have
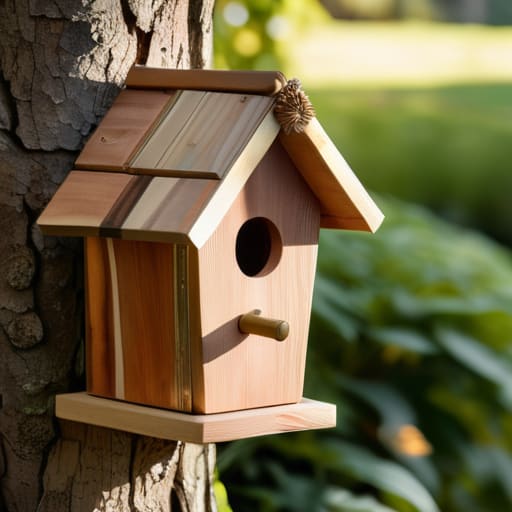
Look, I know the instinct is to run to the hardware store and buy a pristine, expensive slab of cedar, but let’s be real: your budget (and the planet) will thank you if you look elsewhere first. If you happen to find some leftover scraps from a previous home project, use them. This cedar wood birdhouse project doesn’t need to look like it belongs in a high-end boutique catalog. If the wood is slightly weathered or has a few knots, honestly, the birds won’t care. They just want a sturdy place to nest.
One thing I’ve learned from my time at the community garden is that precision matters more than aesthetics. If you’re aiming for specific residents, like bluebirds, you need to be intentional about your safe birdhouse entrance hole size. If that hole is even a fraction too big, you’re basically inviting unwanted guests to take over the nursery. Also, don’t go overboard with the chemicals. When it comes to weatherproofing outdoor birdhouses, skip the toxic stains. A simple natural oil or just letting the cedar age naturally is much better for the ecosystem you’re trying to support.
Essential Woodworking Tools for Beginners Without Breaking the Bank
Look, I know the first time you walk into a hardware store, the sheer amount of specialized machinery can feel incredibly intimidating. You don’t need a table saw or a high-end drill press to get this done. Honestly, if you’re just starting out with woodworking tools for beginners, keep it simple. A basic hand saw, a hammer, a measuring tape, and a screwdriver are more than enough to get your project off the ground. I actually prefer using manual tools for smaller tasks like this; it forces you to slow down and actually connect with the material, which makes the whole process way more meditative.
If you do decide to invest in one power tool, make it a decent cordless drill. It’ll save your wrists a lot of grief when you’re driving screws into thicker pieces of wood. Just a heads up: when you’re prepping your layout, pay close attention to the safe birdhouse entrance hole size for the specific species you want to host. If that hole is even a fraction too big, you might end up inviting the wrong neighbors into your backyard. Stick to the basics, use what you have, and don’t let the “pro” gear gatekeep your creativity.
Real-World Tips for a Birdhouse That Actually Works
- Don’t get obsessed with making it look “Pinterest-perfect.” Birds don’t care if your edges are slightly uneven or if the paint job is a little wonky; they just want a dry, safe place to nest. Focus on function over aesthetics.
- Skip the fancy hardware store kits. If you have some scrap plywood or even old fence slats lying around the garage, use those. It’s cheaper, better for the environment, and honestly, it gives the project more character.
- Watch your entrance hole size. This is the part people always mess up. If the hole is too big, predators can get in; if it’s too small, the birds can’t fit. Do a quick Google search for the specific bird species in your area before you start drilling.
- Avoid using toxic finishes. I know, a bright neon-painted birdhouse looks cute, but the fumes and chemicals can actually harm the hatchlings. If you must paint it, stick to water-based, non-toxic options and only paint the outside.
- Give it some breathing room. Make sure you drill a few tiny holes in the bottom for drainage and a couple near the top for ventilation. Nobody wants to live in a damp, stuffy house, and your feathered neighbors shouldn’t either.
The Bottom Line
Forget the expensive, pre-made kits; the best birdhouse is the one you build from scrap wood or whatever you’ve got lying around the garage.
You don’t need a professional workshop to get this done—just a few basic tools and a willingness to make a few mistakes along the way.
Focus on function over aesthetics—as long as it’s sturdy and safe for the birds, it’s a massive win in my book.
Don't Sweat the Small Stuff
At the end of the day, building this birdhouse isn’t about achieving some Pinterest-perfect woodworking masterpiece. It’s about taking those scraps of wood you were going to toss, grabbing a few basic tools, and actually making something with your hands. We covered how to pick functional materials without overspending on fancy cedar and how to work with the tools you likely already have tucked away in a junk drawer. If your edges are a little uneven or your measurements are slightly off, it doesn’t matter. The goal was to build something functional and useful, and you’ve already done the hardest part by just starting.
I hope this project reminds you that you don’t need a massive workshop or a huge budget to contribute something meaningful to your environment. Whether it ends up looking a little weathered or perfectly sanded, that birdhouse is a win because it’s a product of your own effort. Stop waiting for the “perfect” moment or the “perfect” set of supplies to begin your next project. Just grab what you have, get a little sawdust on your hands, and embrace the messy process. You’ve got this, and honestly, the birds won’t care about your aesthetic anyway.
Frequently Asked Questions
Do I really need to treat the wood, or will that end up being toxic for the birds?
Honestly, skip the chemical stains and heavy-duty sealants. Most of those store-bought treatments are full of toxins that can actually harm the birds once they start nesting. If you really want to protect the wood, stick to something natural like raw linseed oil or just leave it raw. Nature is pretty resilient, and honestly, a little weathered look just adds character. Let’s keep it simple and safe—the birds will thank you for it.
What’s the best way to hang this without it falling down or looking messy in my yard?
Honestly, don’t bother with those flimsy plastic hooks from the hardware store; they always end up in the dirt after one storm. If you have some leftover twine or even an old wire hanger, use that to create a loop. I usually find a sturdy, low-hanging branch to tie it to—it looks more natural and keeps it from swinging wildly. Just make sure it’s tucked away from heavy wind so it stays put.
How do I know if I'm building it for the right kind of bird, or if I'm just making a random box?
Honestly, if you just build a random box, you’re basically just making garden decor. To actually host some feathered neighbors, you need to be intentional. Different birds are picky—bluebirds want specific hole sizes, while wrens prefer something a bit more enclosed. My advice? Don’t guess. Grab my little notebook, look up which birds are native to your specific zip code, and match your dimensions to their needs. It’s better to build one right than three useless ones.







