Stop That Running Toilet and Lower Your Water Bill
I was sitting in my tiny apartment last Tuesday, trying to focus on a freelance deadline, when that low, constant hiss started again. It’s that sound that tells you your water bill is slowly bleeding out through the bathroom. Most people think that hearing that noise means you need to call an expensive plumber or drop fifty bucks on a whole new tank, but honestly? That’s a total myth. I’ve learned the hard way that knowing how to fix a running toilet is usually just a matter of looking at what’s already inside that tank. It’s rarely a catastrophe; it’s usually just a tiny, annoying part that needs a quick adjustment or a cheap replacement from the hardware store.
I’m not here to give you a complicated manual that assumes you own a full workshop. Instead, I want to show you how to tackle this with zero stress and probably just a pair of hands and a bit of patience. We’re going to walk through the actual, common culprits—like a finicky flapper or a misaligned chain—so you can stop the waste and save your money for things that actually matter. Let’s get into it and fix this using what you’ve already got.
Guide Overview
Tools & Supplies
- Adjustable wrench for tightening bolts
- Screwdriver for securing tank components
- Sponge or towel to absorb excess water
- Replacement flapper (1 unit)
- Replacement fill valve (1 unit)
- Replacement toilet tank refill tube (1 unit)
Step-by-Step Instructions
- 1. First things first, let’s stop the bleeding. Go ahead and reach behind the toilet and turn the silver knob (the shut-off valve) clockwise until it stops. This cuts the water supply so you aren’t dealing with a constant flood while you’re trying to work. If that valve is stuck because it hasn’t been touched in years, don’t force it too hard or you might snap something; just give it a gentle nudge or move to the next step.
- 2. Pop the heavy lid off the tank and set it somewhere safe—ideally on a towel so you don’t scratch your floor or crack the porcelain. Once the lid is off, take a look at the “innards.” You’re looking for the flapper, which is that rubber plug at the bottom of the tank. If it looks slimy, warped, or just plain old, that’s almost certainly your culprit.
- 3. Check the chain connecting the handle to the flapper. This is a super common issue that people overlook. If the chain is too tight, it keeps the flapper from sealing; if it’s too long, it gets caught underneath the seal and lets water leak through. Adjust the clip so there’s just a tiny bit of slack, and see if that does the trick before you go buying parts.
- 4. If the chain looks fine but the water is still trickling, it’s time to inspect the water level. Look at the overflow tube (that open pipe sticking up in the middle of the tank). If water is pouring into the top of that tube, your fill valve is set too high. You don’t need a plumber for this; just find the adjustment screw on the fill valve and turn it until the water stops about an inch below the top of the tube.
- 5. If the water level is fine but the tank won’t stop running, the flapper is likely just dead. Since I’m a big fan of not wasting money, check the local hardware store for a universal flapper rather than a brand-specific one—they’re usually way cheaper and work just as well. Just make sure you bring a photo of your current setup so you don’t grab the wrong size.
- 6. To swap it out, unhook the old chain, pull the old rubber flap off the pegs, and snap the new one into place. It’s literally as simple as that. Once it’s seated, reconnect the chain, turn your water valve back on, and give it a test flush. If you don’t hear that annoying, ghostly trickling sound after a minute, you’ve officially saved yourself a massive water bill and a headache.
Mastering Toilet Flapper Replacement Without the Stress
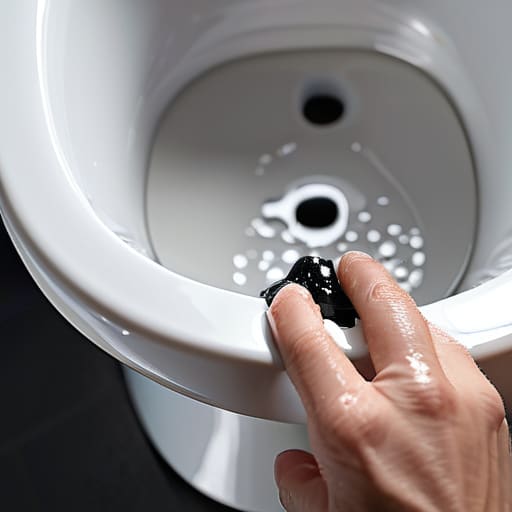
If you’ve reached the point where you’re looking at a worn-out rubber piece and thinking, “I can definitely handle this,” you’re already halfway there. When you’re doing a toilet flapper replacement, the biggest mistake I see people make is rushing the connection. Don’t just shove it in there and hope for the best. Before you drop the new one in, take a second to wipe down the rim of the flush valve with a damp cloth. If there’s any old, crusty buildup left behind, even a brand-new flapper won’t create a tight enough seal, and you’ll be right back to square one with that annoying phantom flushing.
Also, keep an eye on your chain tension. It’s a tiny detail, but if the chain is too tight, it holds the flapper open; if it’s too long, it gets caught underneath. You want just enough slack to move freely without getting tangled. While you’re under the lid, check the water level in toilet tank to make sure it isn’t constantly spilling into the overflow tube. Sometimes it’s not even a leak, just a simple adjustment needed to keep things balanced.
Simple Flush Valve Troubleshooting for a Quiet Bathroom
If you’ve already swapped out the flapper and you’re still hearing that ghostly trickle of water, it’s time to look a little deeper. Sometimes the issue isn’t the rubber seal, but the actual mechanism that controls the flow. This is where flush valve troubleshooting becomes a bit more technical, but don’t panic—you don’t need a plumbing degree to handle this. Check to see if the valve seat (the ring the flapper rests on) has any mineral buildup or cracks. If it’s slimy or rough, a quick scrub with an old toothbrush can sometimes do the trick without you having to buy a single new part.
Another common culprit is the water level in the toilet tank being set just a hair too high. If the water is constantly spilling into the overflow tube, it’s going to sound like a running faucet all day long. Instead of calling a professional, try a simple toilet fill valve adjustment. Most valves have a screw or a clip that lets you lower the float. It’s a five-minute fix that can save you a ridiculous amount on your monthly water bill.
A few extra tricks to save your sanity (and your water bill)
- Check the water level in the tank before you go buying parts; if it’s spilling into the overflow tube, you probably just need to turn the little adjustment screw on your fill valve rather than replacing the whole thing.
- Give the chain a quick inspection—if it’s too long, it gets caught under the flapper and keeps the water running; if it’s too short, it won’t let the flapper seal properly, so just find that sweet spot.
- Clean out any gunk or mineral buildup around the rim of the flush valve with a bit of vinegar; sometimes it’s not a broken part, just a dirty one preventing a tight seal.
- Don’t forget to shut off the water supply valve first—it’s usually right behind the toilet—so you aren’t dealing with a mini indoor flood while you’re trying to work.
- If you’re replacing a flapper, grab one that’s specifically designed for your toilet type; there’s nothing more frustrating than spending money on a part only to realize it doesn’t actually fit your tank.
The Bottom Line: Don't Overcomplicate It
Before you go spending money at the hardware store, check the basics—most of the time, a running toilet just needs a quick adjustment or a part you probably already have in your junk drawer.
You don’t need to be a plumber to handle this; if you can swap out a flapper or tighten a bolt, you’ve already won half the battle.
Stop letting that constant trickle drain your bank account; fixing it now saves you more than just water, it saves you the stress of a massive utility bill later.
You’ve Got This
At the end of the day, fixing a running toilet isn’t about being a master plumber; it’s just about a little bit of investigation and some basic troubleshooting. Whether it was a worn-out flapper that needed replacing, a misaligned float ball, or just a quick adjustment to the fill valve, you’ve successfully tackled a problem that was literally draining your bank account. Instead of calling out a professional and paying a massive service fee, you took a second to pop the lid off and see what was actually going on. You’ve saved water, saved money, and most importantly, you’ve stopped that constant, annoying phantom flushing from ruining your peace of mind.
I know that staring at a tank full of water and mechanical parts can feel intimidating if you aren’t used to it, but I promise that small wins like this are how you build real confidence. We spend so much time feeling like we need to buy something new or hire someone else the moment something breaks, but there is so much power in just being resourceful with what you already have. Don’t let the “perfect” DIY aesthetic fool you—real life is messy and sometimes your hands get a little dirty. Just keep showing up, keep fixing what you can, and remember that sustainability starts with maintenance.
Frequently Asked Questions
I replaced the flapper but it's still running—could there be something wrong with the water level in the tank?
Honestly, yeah, that’s a super common culprit. If your water level is set too high, it’ll constantly spill into the overflow tube, making it sound like it’s running even with a brand-new flapper. Grab a screwdriver and check your fill valve; you usually just need to adjust the float screw to lower the water level. It’s a five-minute fix that’ll save you way too much money on your water bill.
Is there a way to tell if I actually need a whole new fill valve or if I can just clean the parts I already have?
Honestly, don’t go out and drop twenty bucks on a new kit just yet. First, take a look at the debris. If you see sand, grit, or weird buildup near the valve opening, a quick flush or a soak in some white vinegar might do the trick. But, if the plastic looks cracked or the seal feels totally shot, cleaning won’t save it. If it’s still acting up after a scrub, it’s time to replace it.
How do I know if the constant running is a simple fix or if I'm about to face an expensive plumber bill?
Honestly, don’t panic. If it’s just a constant trickle or a weird phantom flush every twenty minutes, it’s almost certainly a cheap fix—think a $10 flapper or a loose chain. That’s just maintenance. But if you see water pooling on the floor, hear loud banging in the pipes, or the tank won’t refill no matter what you do, that’s when you might need a professional. Check for leaks first; most of the time, it’s just a tired part.







